The Straw Bale Pallet Crate Garden – Simple, Attractive – And Cheap!

A simple crate planter made from pallets and using a straw bale for a growing medium
So you have little space, little time, little money and you still want to garden. Or maybe you would like to add a great looking focal point to your existing garden or landscape to grow something unique. Even better, maybe you know of someone who still likes to garden but can’t get out or handle as much of the physical activity anymore.
Here is a great solution to all three! Create your own Pallet Straw Bale Crate Garden. It’s attractive, simple to build, and best of all, low or no cost to make.

To build on the cheap, you can create the straw bale frame using the slats from a single pallet
With a single pallet, (3) 2x4x8′s, a bale of straw, and a bag or two of soil and compost – you can create an instant garden space that can provide fresh vegetables or flowers all summer long.
You can purchase all the materials you need for under $15.00 – or build for virtually free using pallets and scrap lumber. We made a few single bale boxes last week for our garden – and will use them along our fence row to grow our cucumbers in. You can also double the measurements to make a double bale box and plant to your heart’s content.
The straw bale crates have a lot of built-in advantages! They are easy to maintain – with little weeding ever needed. The 2’ high design lends itself to less stooping and bending while tending, and the combination straw, compost and soil make for a great instant growing medium – without the hassle of digging up the earth.
The best part of all – at the end of the season – you can add all of the contents to the compost pile –or start a compost pile right in the pallet box to have fresh compost next year when you’re ready to grow again!
Here is how we made ours:
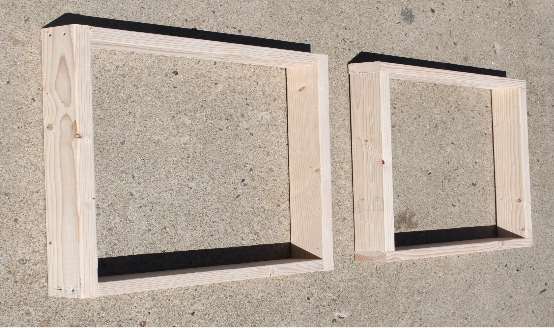
Start by assembling 2 rectangle frames from scrap wood or 2 x 4′s.
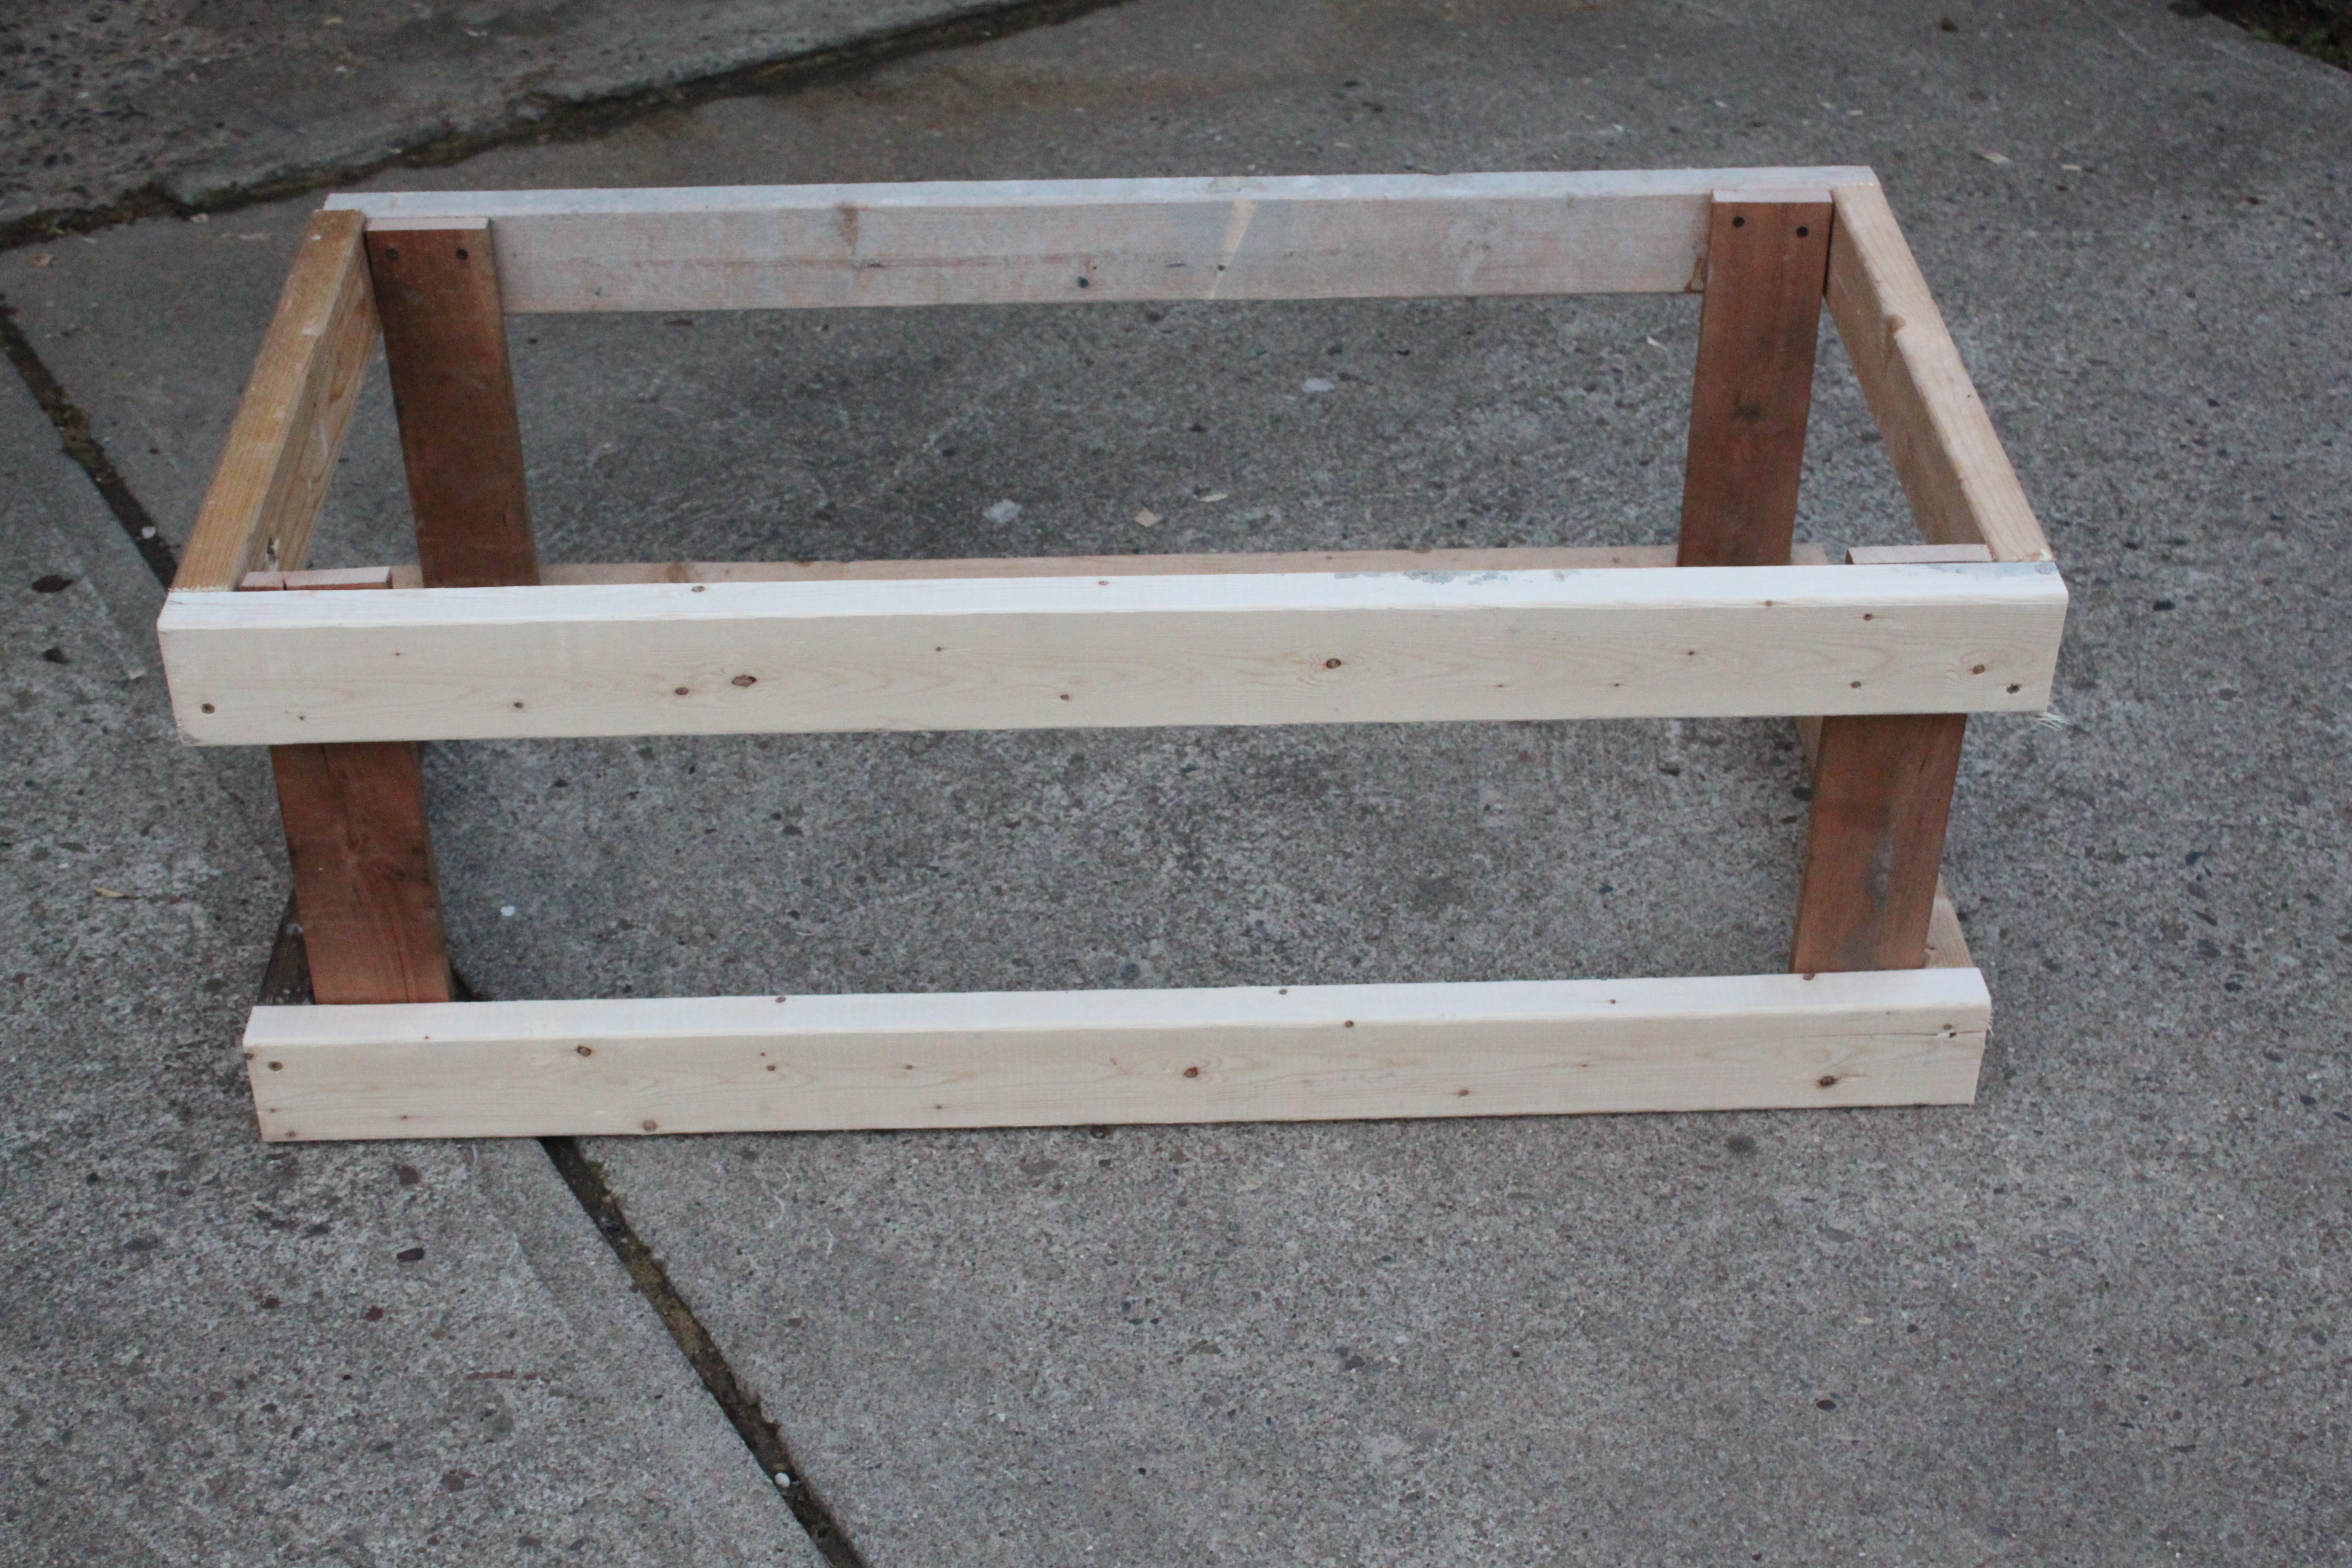
Next – attach the two rectangles with four of your slat boards in each corner

Next – screw in additional slat boards to create the crate “look”.
Materials List:
(1) Straw Bale
(4) 2 x 4 x 20”
(4) 2 x 4 x 44”
(1) Pallet – for vertical boards – be sure to use untreated pallets to be “food safe”
(1) bag of compost – substitute your own for free material
(1) bag of topsoil – substitute your own for free material
(4) 2 x 4 x 20”
(4) 2 x 4 x 44”
(1) Pallet – for vertical boards – be sure to use untreated pallets to be “food safe”
(1) bag of compost – substitute your own for free material
(1) bag of topsoil – substitute your own for free material
***The straw bales we use measure 20″ wide, 18″ high and a little less than 46″ long. Bales can vary in length – so be sure to measure your bale to adjust the length and width of frame boards. You can also reference our previous post’s on How To Disassemble A Pallet Quickly, and How To Make Your Own Compost for more info.
Building The Garden:
Assemble 2 rectangles from your 2×4’s – screwing or nailing together 2 of the 20” pieces and 2 of the 44” pieces. Once you have both rectangles together – use your pallet boards to attach vertically to connect the two rectangles to create your straw bale box.
We cut our pallet slat boards into 18″ lengths, (we got about 2 boards for each slat) and then screwed them into the inside of the two frames to form the crate. The spacing is up to you – we put about 4” between each board for ours – we wanted the look of an “old-time” crate.
Planting The “Garden”

Next -use a sharp knife, reciprocating saw or shovel to dig out a 6 to 8″ planting hole
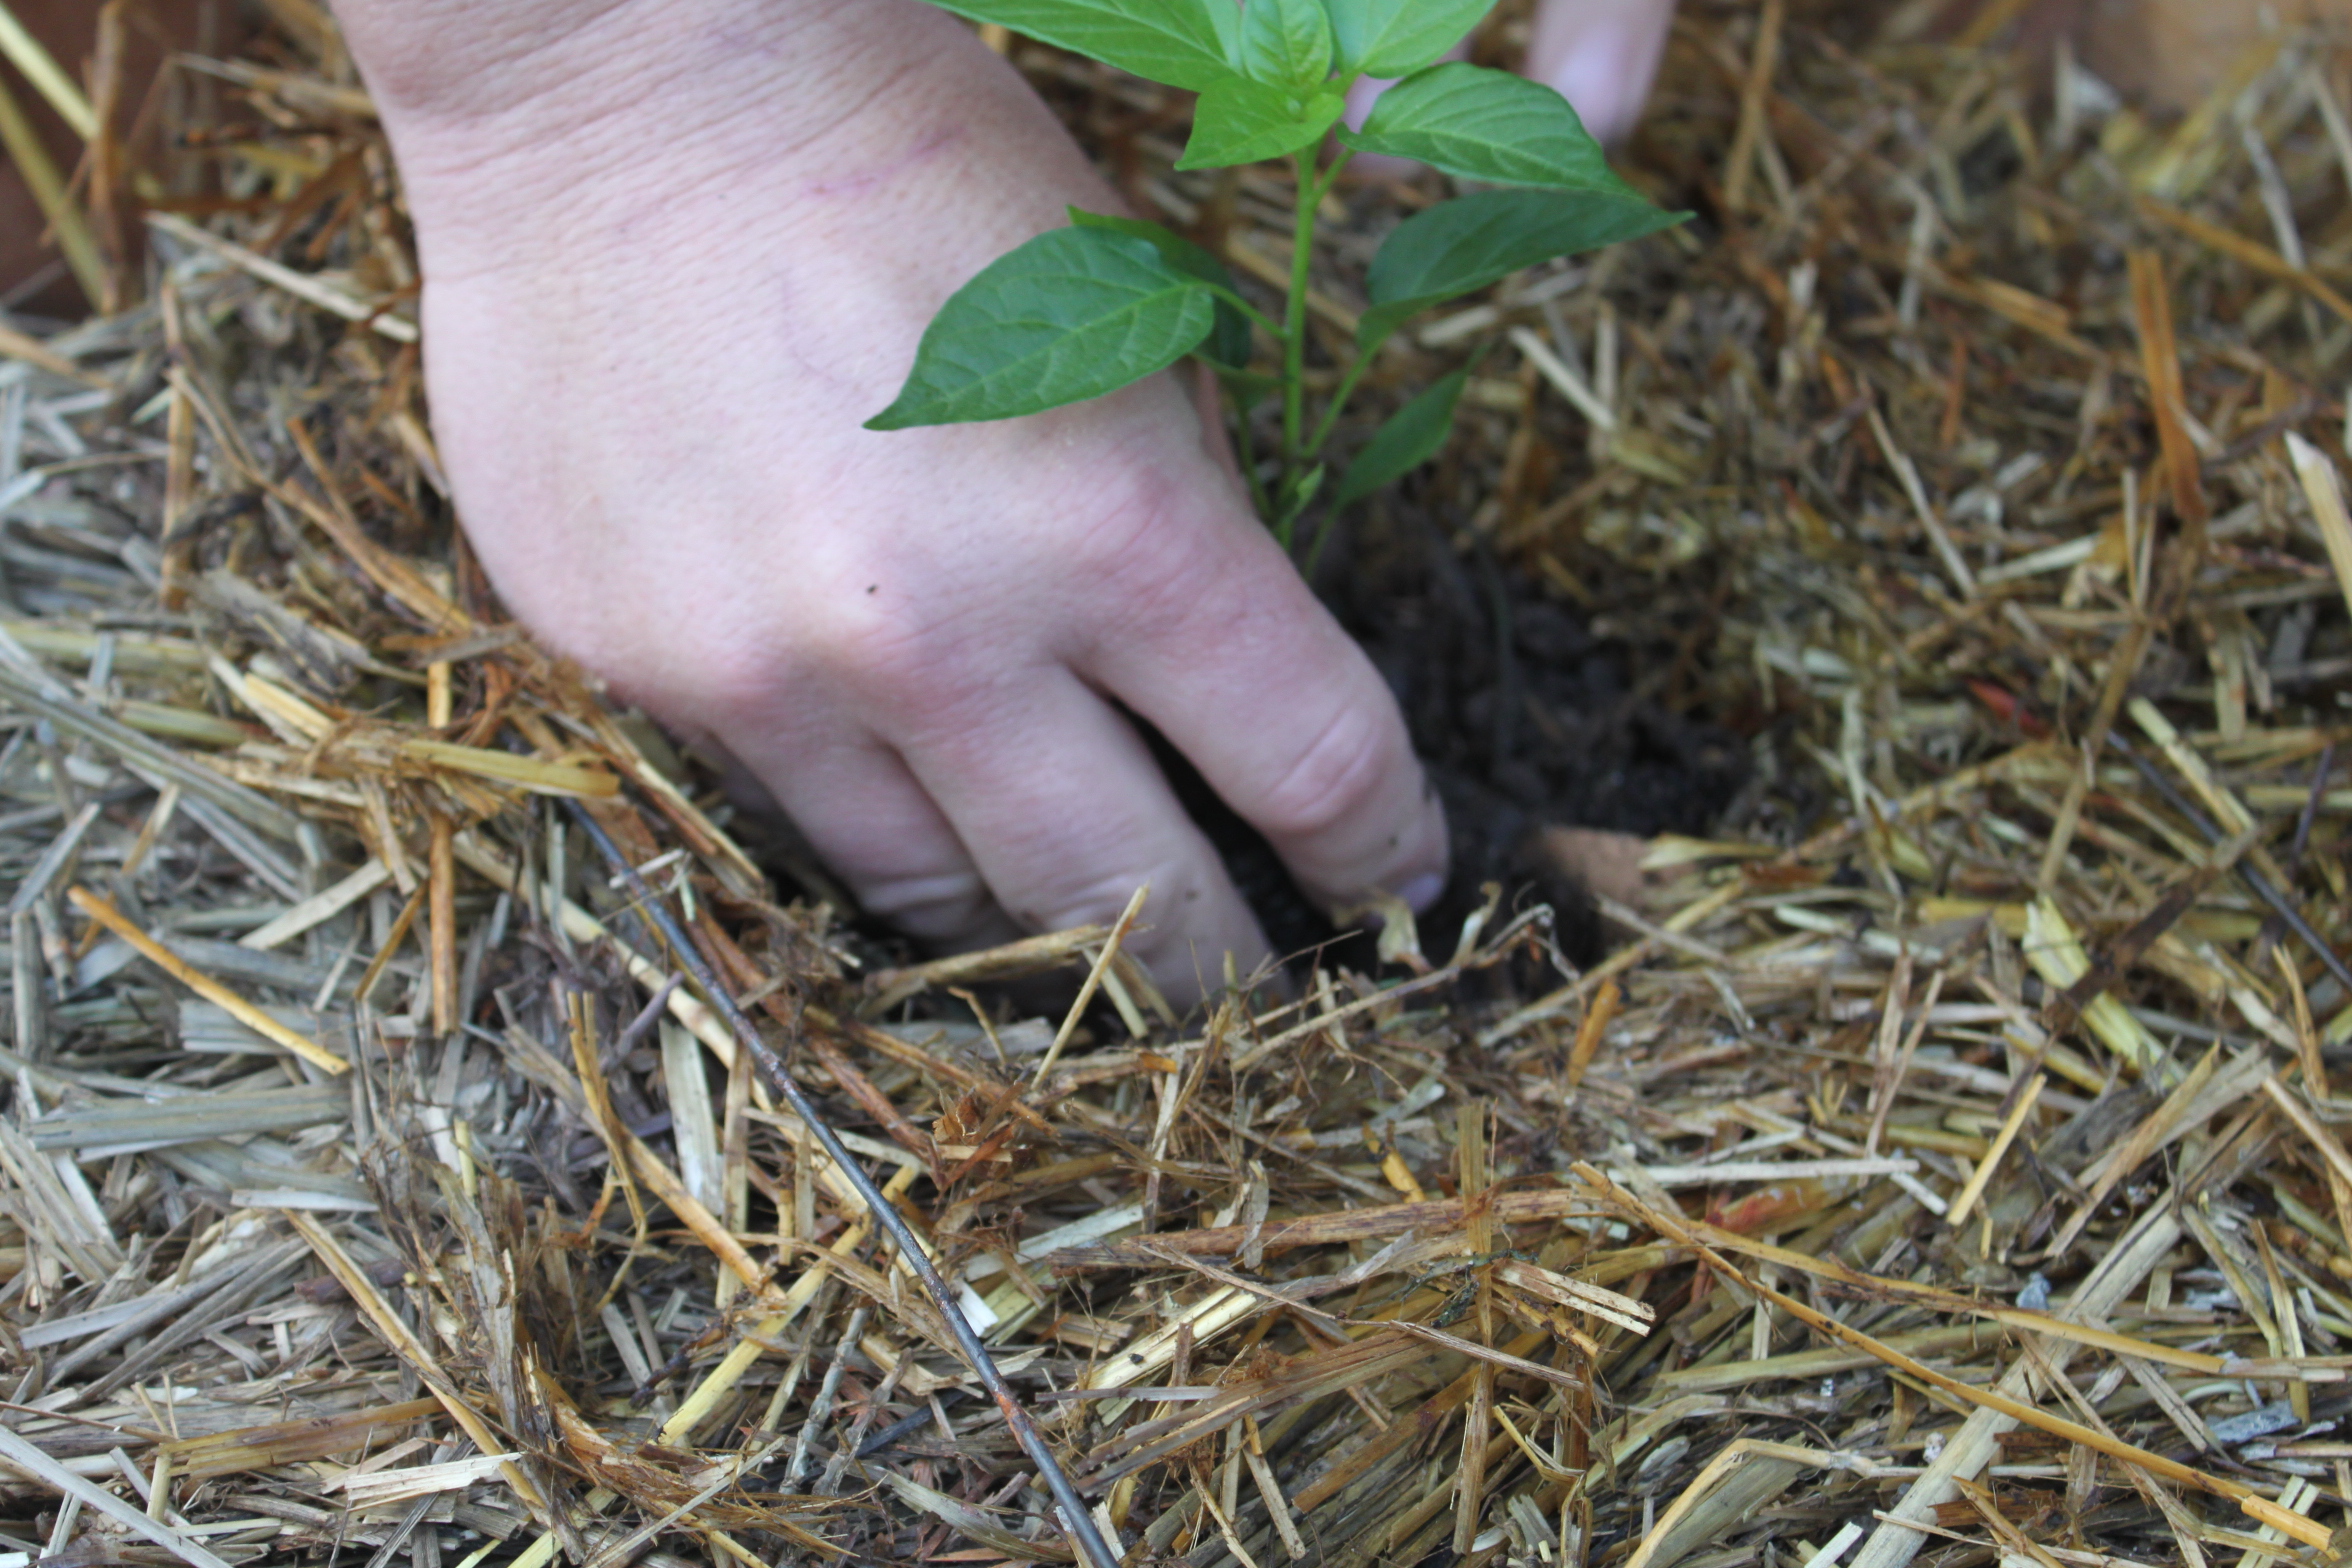
Simply place your plant in the hole and cover with more soil.
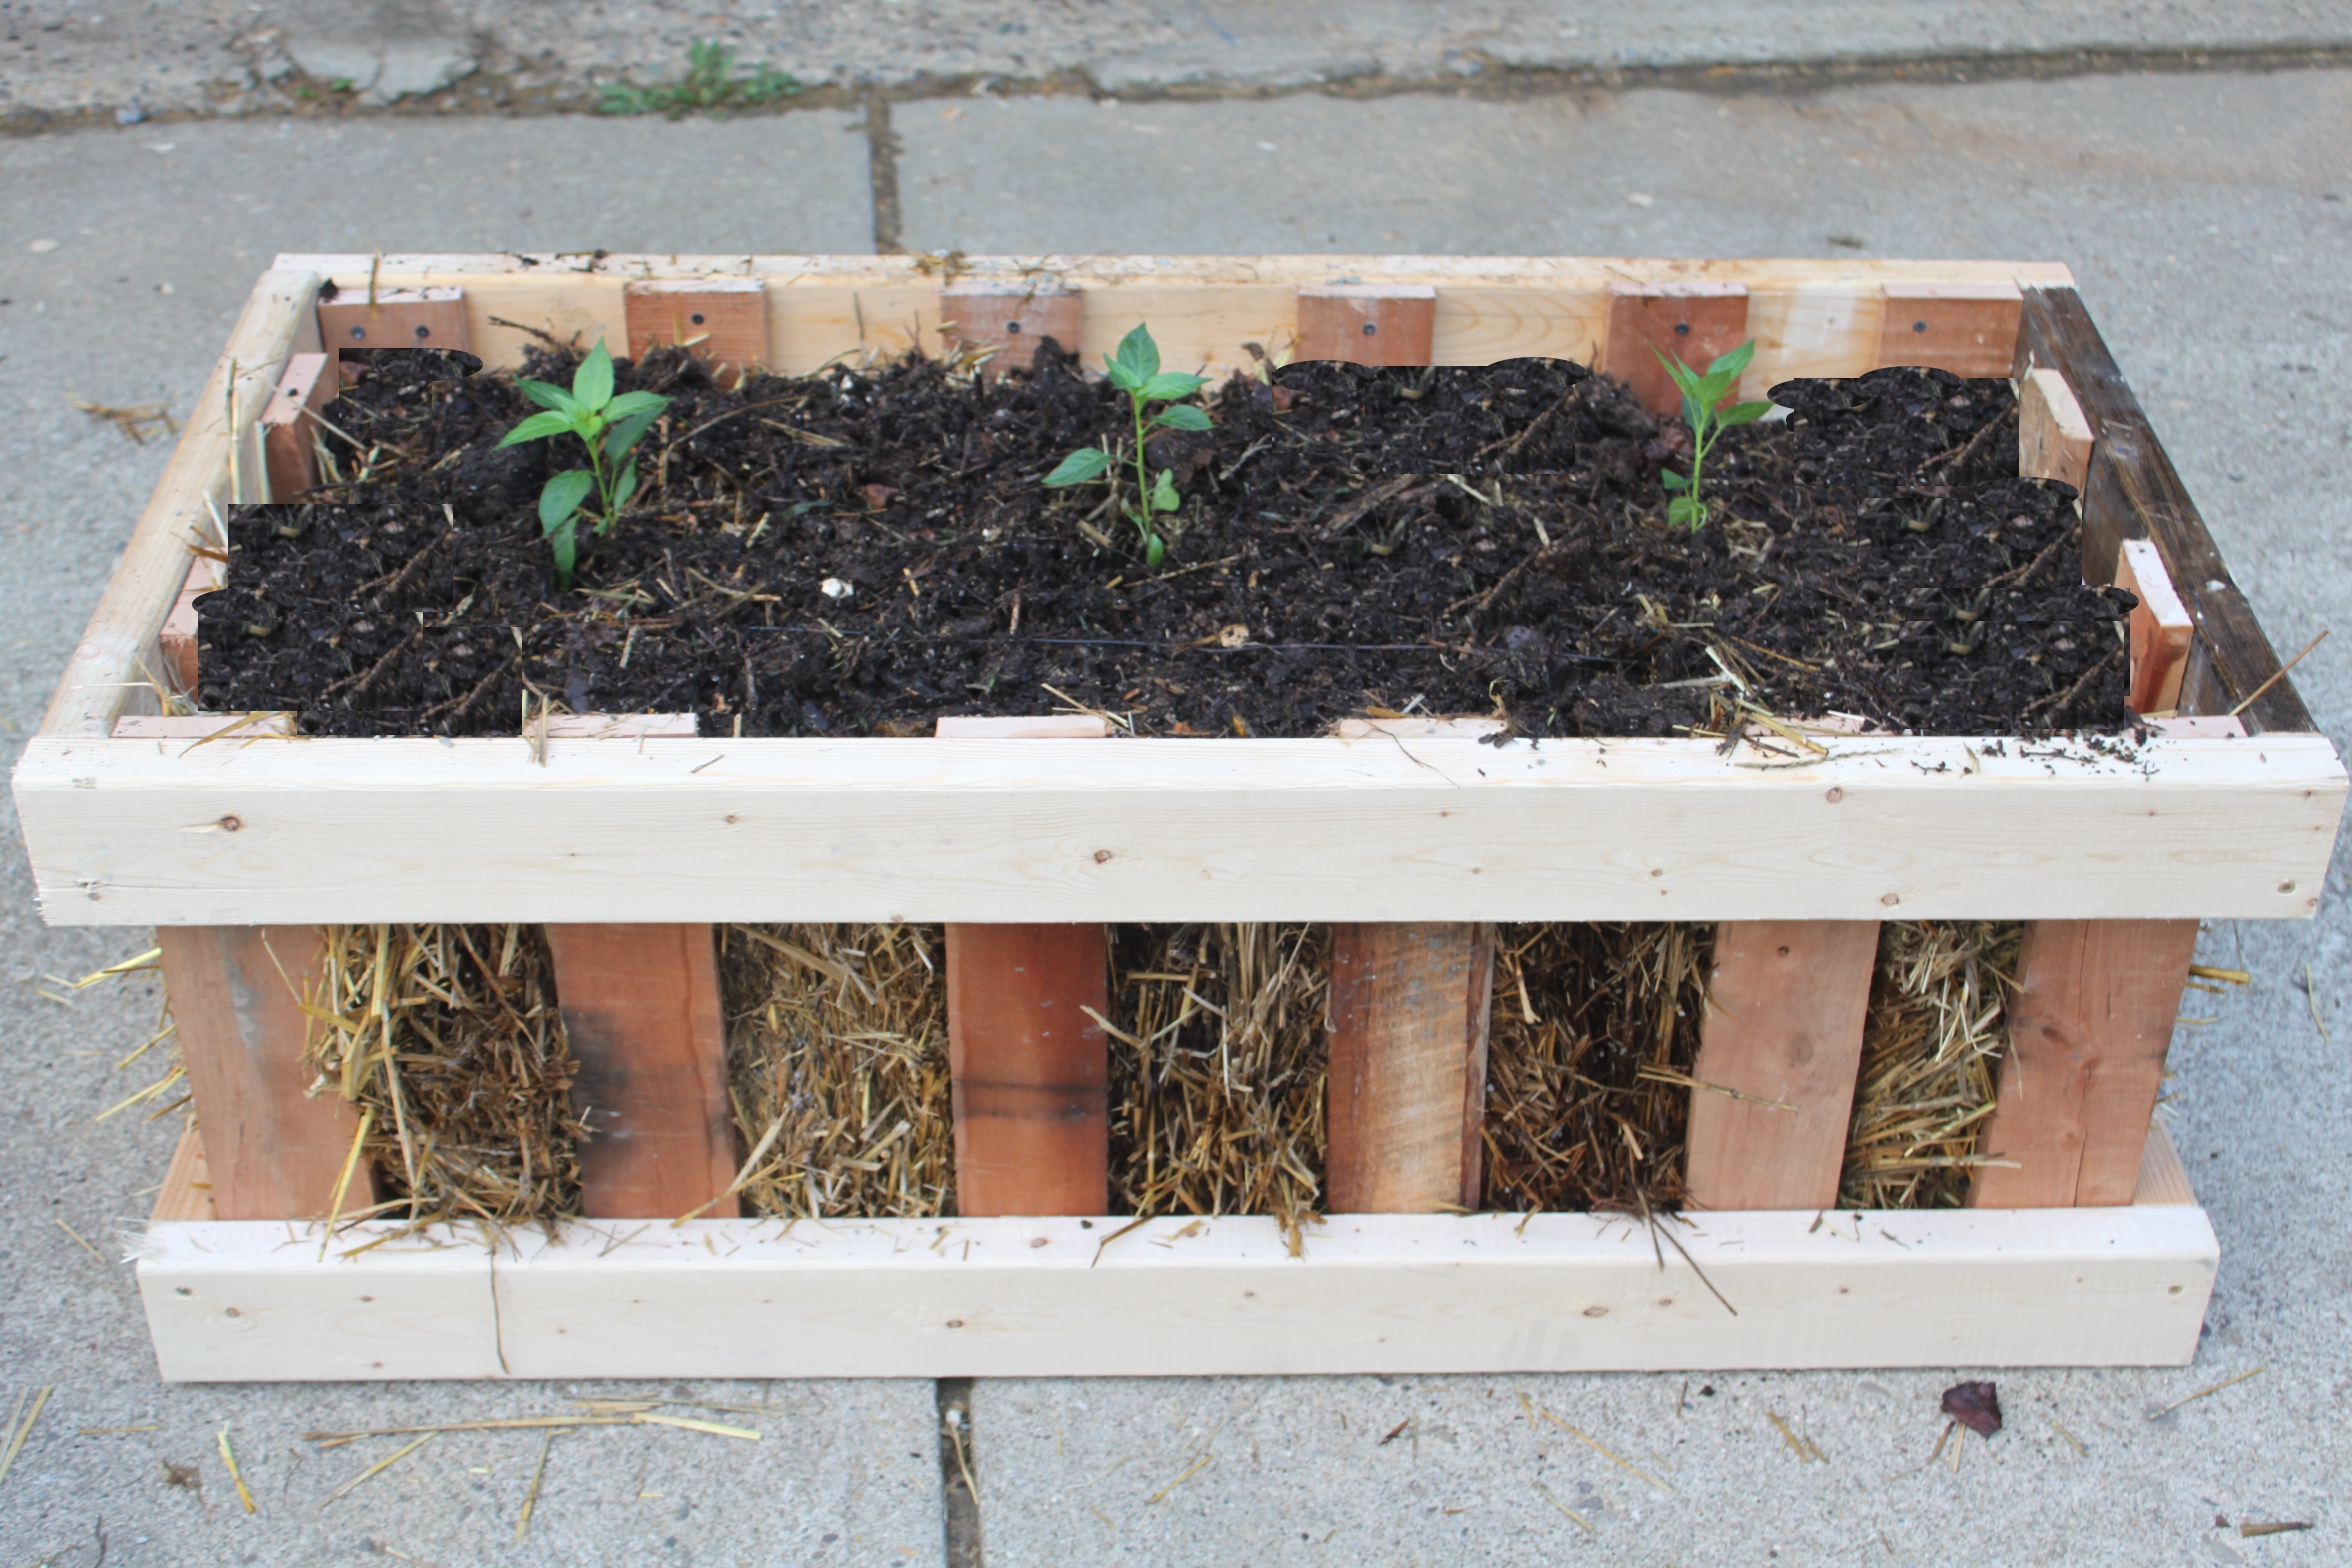
We like to put a layer of compost or mulch over the top of the bale to complete the look.
Now it’s easy – place the bale down inside the frame – you may need to wiggle a little and cut a little off here and there to get it to fit depending on the size of the bale.
Simply use a sharp knife or blade to cut out your planting holes – we went about 8” deep and 5” around– filling them with a good mixture of garden soil and compost. Plant, cover up, water – and the garden is in! Depending on what you plant – you can fit in 5 to 6 tomato plants, or a combination of pepper and tomato plants per bale, etc. You can plant a little closer than traditional garden rows because of the raised beds. Only your imagination is the limit to what you want to grow!
You will get some compression of the bale as the season progresses – the bale will slowly decompose, giving even more nutrients to the plants. Your plant and roots will thrive in the soil, compost and straw because the garden is off the ground – there will be very little weeds that develop, and should be easy with the added height to pick and maintain.
End of the Season :
If you have a compost bin already set up – you can certainly take the contents and throw them into the pile. The decomposed straw and soil mixture are great for a pile – adding a lot of carbon material. If not – use the crate box as a compost bin! Mix up the bale and contents right in the pallet box structure – and start adding some shredded fall leaves, coffee grounds, vegetable scraps , lawn clippings and more. By next spring – you will have enough compost made to use in the next bale for planting, with extra if you need it.
So how about trying a straw bale pallet crate garden this year! And if you have a neighbor or relative that loves garden but finds it difficult now – it’s a great gift to let them have their very own garden
I want one of these to put my lettuce, spinach etc in on my front porch!
ReplyDelete