Wednesday, May 22, 2013

Excited to learn about herbs....

Growing Herbs – Great For Your Garden…And Your Kitchen!


growing herbsThe varieties are endless. Basil, Cilantro, Thyme, Dill, Oregano, Chives, Mint and oh so many more. Herbs are some of the easiest and low maintenance plants to grow, and can be tucked in almost anywhere. It’s a shame that more often than not, they take a back seat to more familiar food crops such as peppers, tomatoes, corn and beans in the backyard garden plan.  Especially when you consider they bring loads of taste and flavor to the dinner table.  Herbs are the ultimate dual use plant – providing for great culinary use in the kitchen, while adding visual and aromatic appeal to your landscape, garden, patio or porch area.
Although they flourish when planted in a garden or flowerbed setting – almost all herbs can be grown in pots and containers as well.   The key with working herbs into your landscape is to think outside the “box” to add extra interest – like adding mint to a hanging baskets as a trailing accent plant – not only will it look beautiful, but it can make your porch or patio come alive with its wonderful scent.
Basil and Oregano are a big part the fresh ingredients we use to make our home made pasta sauce
Basil and Oregano are a big part of the fresh ingredients we use to make our home-made pasta sauce
And as an added benefit, many herbs can be successfully potted up and grown through the cold winter months in a sunny windowsill, providing a little extra “freshness” to your winter cooking.
A final note on using herbs in the kitchen –  it may sound a bit odd, but remember when using in a recipe – you need to increase the amount of fresh herbs to equal the same effect if you used traditional dried varieties.  Why? Dried herbs have much more concentrated flavors, and therefore you need less of them.  There is no perfect ratio, but most cooks will tell you a 2:1 or 3:1 ratio is best.  The trade off for using fresh – the flavors are more pure and true.
Although there are endless varieties available, here are 6 of our favorite herbs that are easy to get started, and serve many uses in our kitchen and landscape.
Cilantro / Coriander
The coriander seeds late in the season on a cilantro plant
If you love salsa and want to make your own – cilantro is the choice for you.  Many think that cilantro and coriander are two separate plants – when in fact – they come from the very same plant and produce two separate and distinct flavors. Cilantro and Coriander are one in the same.  The fresh young tender leaves are the unique spicy taste we know as cilantro in salsa, and the mature seeds that develop on older plants are the spice you know as Coriander. Cilantro will grow best in the cooler temperatures of spring and fall, so sewing seeds both early and late in the year is a good idea. Cilantro is one of those plants that do well in pots and planters.  Once the hot heat of summer comes, the plants will bolt and go to seed, and now you have coriander.  Consider this one the 2 for 1 herb.
Basil
Basil is easy to grow, and has so many uses in the kitchen!
There is nothing in the world that can compare to the taste of sweet basil!  We use generous amounts when we make our home-made pasta and pizza sauce, and it is one of the 3 key ingredients in our favorite summertime appetizer – Basil, mozzarella and tomato slices.  If you have never tried this – make this the year you do!  Basil is extremely easy to grow, and will continue to grow throughout the summer.  Our basil grew out of control last season, and actually re-seeded itself for a tender fall crop as well.  It is considered an annual in our zone – but we rarely have to purchase seeds, because of its ability to re-seed itself each year.
Oregano
Oregeno is a key ingredient in Italian seasoning, and sometimes preferred dried over fresh
Oregano is a key ingredient in Italian seasoning.
This is another must have if you are a lover of fresh pasta sauce! Oregano is a perennial that comes back year after year with its distinct and fresh tasting leaves.  Although there are many types of oregano, we are partial to both the Italian and Greek varieties, using them to flavor our pasta  and pizza sauces. They dry extremely well, and are perfect to make your own home-made Italian seasoning – using equal parts of dried parsley, oregano, basil, thyme and rosemary.  It is actually one herb that a lot of cooks will prefer using dried as opposed to fresh, as the flavor seems to change for the better in the drying process.
Chives
Chives can be used as a garnish, or you can put them in oil to flavor
Chives are one of the tiniest members of the onion family, and their use dates back to ancient Chinese times, where it was used for both medicinal and culinary purposes.
Chives are another perennial that will do just as well in the soil of a garden as it will in a pot on your back porch.  Their uses are many, but probably best known for chopping up and sprinkling on baked potatoes.  They also add a great onion flavor to soups and dry rubs.   Chives can be placed with their stems and blooms in tact in a container of olive oil, to flavor it with a hint of aromatic flavor.
You can split, divide and transplant chives much like ornamental grasses. You can also dig up a small piece and bring indoors in a sunny location to enjoy fresh chives through the winter.
Mints.
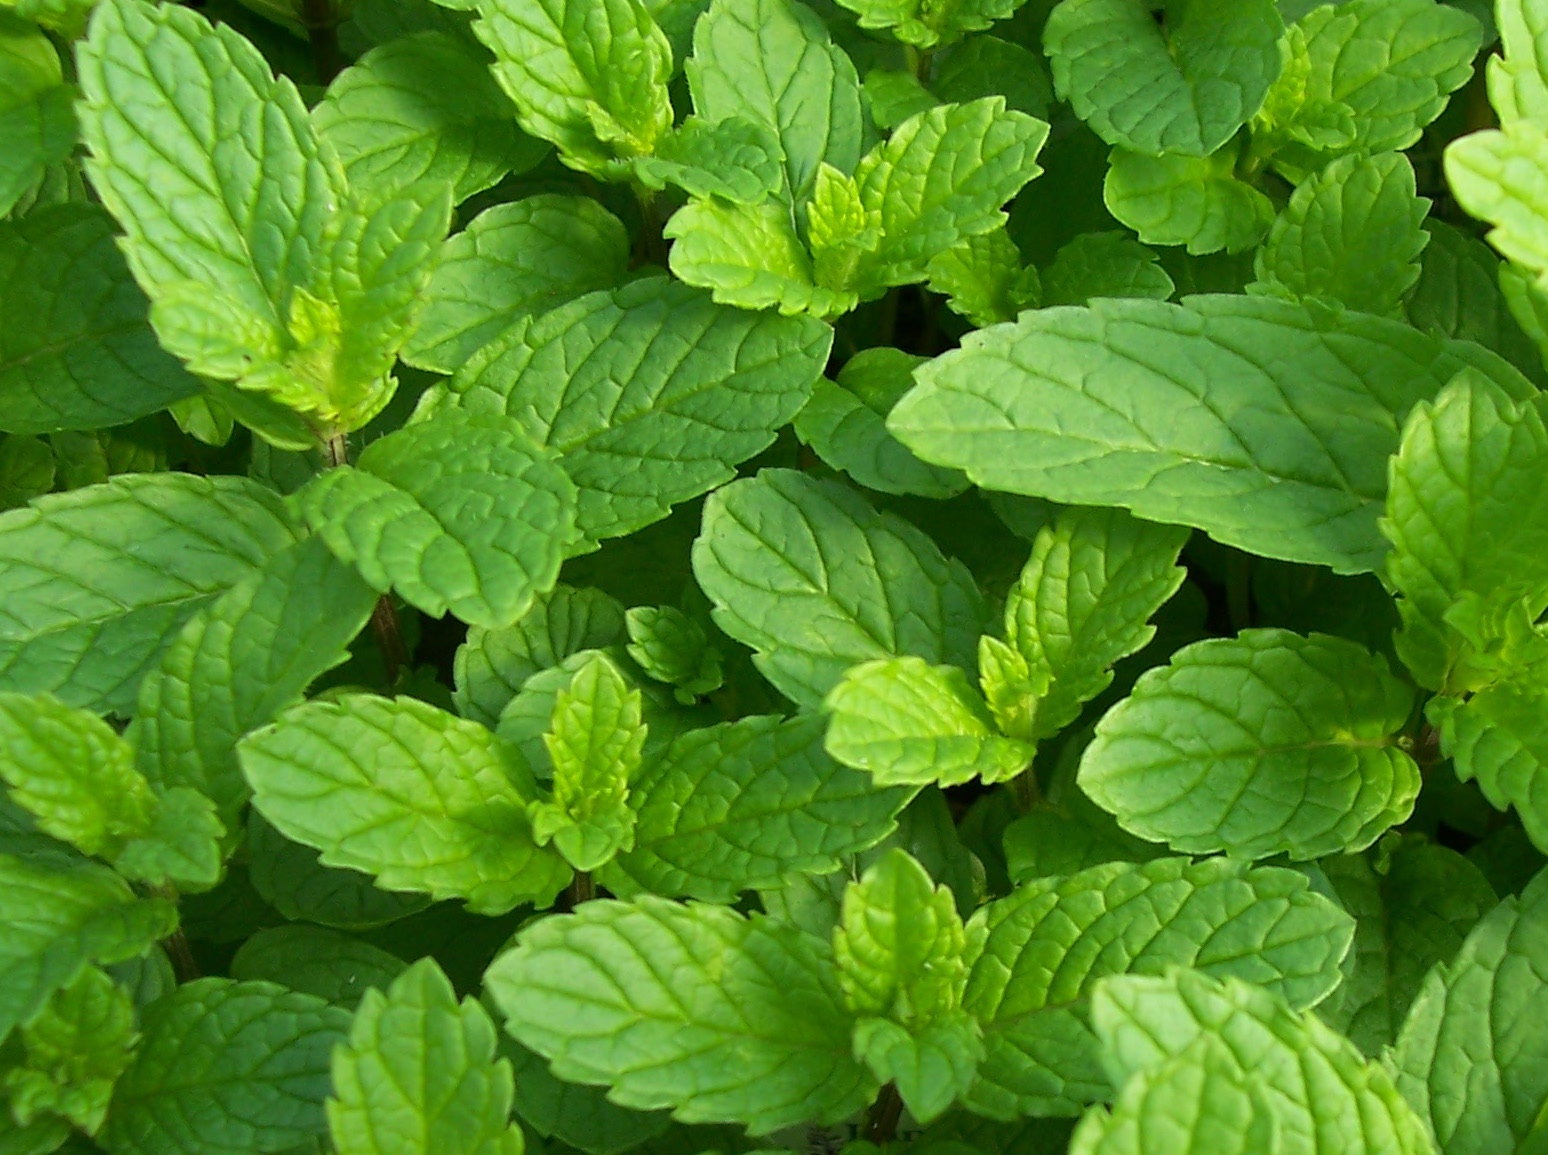
Spearmint is a fantastic smelling herb that can be used in drinks and more
There are a vast array of mint types available – peppermint, spearmint, chocolate and more!  They are fantastic to use as garnish or the main ingredient in your favorite teas or mixed drink –  like a mint julip, mojito, or a soothing peppermint tea to name a few. As an added benefit, they fill the surrounding air with their amazing fragrant scents.
A word of caution with mint however.  They are best planted in pots – even of you plant in the garden.  Mints can be invasive and once they become established – their underground roots can travel far and long and become difficult to remove.  So keeping them in pots is the key.  They are a perennial, and will come back each year with little trouble.
Dill
Dill is a wispy, tall plant that gives texture to your garden
If you want to make your own pickles – then growing dill is a must!  Fresh dill is easy to grow, and can become a focal point in the garden with its tall, fern-like, aromatic spikes. It is one of the taller herbs you will find – growing to heights of 2 to 3 feet depending on the variety.  As dill matures, it is usually best to drive a small stake in the ground for support.   The foliage and flowers are wonderful to use in all kinds of recipes from deviled eggs, to soups and of course pickles! As the plant matures, you also can harvest dill seeds as well.  Dill is a great choice to use in large planters as a tall accent plant – it’s a creative switch to use in place of the old standards like traditional spikes.  They are an annual as well, although much like basil, if you have them in a garden or flowerbed setting, they more than likely will re-seed themselves each year.  Dill is best planted by seed directly in the ground, as it does not transplant well.
So this year, as you get ready to put out all of those fresh vegetable plants in your garden – throw in some herbs in the plan as well – and increase your gardening and kitchen horizons!
Happy Gardening!  Jim and Mary

Monday, May 20, 2013

HERB GARDEN up and running!

Thanks to Linda Shattuck, we are growing herbs this year for the community garden!  See the beginnings of it here....


Thanks, Linda!

Tuesday, May 14, 2013

It's the most wonderful time of the year...fresh veggies from the garden!


Growing Lettuce – Experience Real Flavor!


Concept - a Summer Crisp lettuce is a great choice to sow in late spring because it can tolerate more heat than most lettuce types

Concept - a Summer Crisp lettuce is a great choice to sow in late spring because it can tolerate more heat than most lettuce types

Lettuce is one of the fastest and easiest to grow crops around.  It can be grown in the garden, in containers and raised beds, or almost anywhere you can clear out a little space.

There are hundreds upon hundreds of varieties available - in a myriad of colors, textures, all with their own unique taste.   In fact, for most that begin to grow their own lettuce - they are shocked to realize the amazing difference in taste from the generic varieties available in most super markets and grocery stores.  Most "supermarket" lettuce, (like the familiar Iceburg head lettuce) are grown specifically for their ability to handle shipping and store well - not for taste.  When you begin to grow your own - you might just find out that with all that flavor - salad dressing isn't even needed!

The first of the lettuce is through and almost ready for the first picking - this is Summer Crisp

The first of our lettuce is up and through, almost ready for harvest. Pictured if Black Seeded Simpson.

Lettuce can be divided into many categories - but most will agree on these main four  : Butterhead (Bibb style lettuce) , Crisphead (Iceberg, etc.), Looseleaf (Cutting varieties) and Romaine style.

Lettuce in general prefers cooler weather - so you will want to plant a spring/early summer crop, with a second fall crop as well.  The hot summer heat tends to wilt and bolt lettuce.  The good news is that it's a quick grower, and can actually go from seed to table in as little as three to four weeks!

Preparing The Soil And Planting Lettuce.

Rich, fertile soil is the key to great lettuce.

Rich, fertile soil is the key to great lettuce.

Lettuce prefers loose, fertile, and well-drained soil.  It will struggle to grow well in hard, clay-type soils.  Prepare your beds by adding in lots of compost and organic matter. If your soil is on the clay-type side - you can also add a few shovel-fulls of sand to help loosen the soil structure and aid in drainage.

Lettuce can be planted with transplants or by directly sowing seed into the soil. We prefer planting most of ours by seed, mainly for the convenience, and for us, they have seemed to do better emerging from the soil than they have as transplants.

If your soil is fertile, lettuce will not require much additional care other than keeping it watered throughout dry periods.  Lettuce, like most vegetable crops, should receive about 1" of water per week.  If you do want to fertilize - an application of compost tea can be applied once the crops have emerged through the ground.

There is so much more to choose from than just "traditional" Iceburg lettuce

There is so much more to choose from than just "traditional" Iceburg lettuce

We use a fair amount of straw mulch around the plants to keep weeds to a minimum - weeds can wreak havoc on lettuce crops.  Be sure to take care when weeding - lettuce roots are shallow and are easily pulled from the soil.

To help keep pests at bay - we like to plant a few of our hot pepper plants near our lettuce or directly in the middle of the lettuce bed. Garlic and onions are also known to have the same effect when planted near lettuce crops.

Harvesting Your Lettuce Crop:

Leaf lettuce can be harvested whenever the plants begin to become large enough to snip their tasty leaves.  The beauty of leaf style lettuce is that you can get multiple cutting from the same planting - increasing your yields.  Be aware though, that after the first few cuttings, the leaves will start to become a little less tender with each cutting.  If left alone, leaf lettuce will usually reach their maximum size in about 50 to 55 days.

Most head lettuce varieties mature in 55 to 70 days - and it is important to harvest them before the summer heat begins to wilt their leaves and change their taste.

To store lettuce, wash, drip or spin dry, and place in a plastic bag in the refrigerator. Lettuce keeps best right around 32°F.

Here are some of the types we grow and love:

We love Romaine Ridge - an organic variety we found at Johnny's Seeds.

We love Romaine Ridge - an organic variety we found at Johnny's Seeds.

Buttercrunch :  The name says it all!  Tasty, buttery leaves with a crisp bite.

Black Seeded Simpson :  A crisp, leaf lettuce with great flavor - also handles heat a little better than other varieities

Red Salad Bowl :   Just like its name, a great tasting, beautiful red-leafed lettuce adding lots of color to your plate.

Bibb Lettuce :  We use a variety call "Winter Bibb" - but bibb lettuce in general has a sweet, buttery leaf perfect for fresh salads.

Bibb lettuce is a great choice for the home gardener - it is full of flavor!

Bibb lettuce is a great choice for the home gardener - it is full of flavor!

Romaine (Ridgeline) : This is an amazing variety of romaine - easy to grow, with wonderful flavor.

Concept : A Summer Crisp lettuce, it's a great choice to sow in late spring because it can tolerate more heat than most lettuce types

Happy Gardening – Jim and Mary

Thursday, May 9, 2013

Peppers...peppers...we are almost ready to plant our seedling peppers!


ALL ABOUT PEPPERS…How To Grow All Kinds Of Peppers In Your Garden

A green bell pepper glistens just after a rain at the farm
Last year was a banner year for peppers in our garden!
Take a stroll down the produce aisle at your local grocery store and you will quickly notice that peppers have grown in popularity.  No longer are we stuck settling for just the so-called “Traffic Light” varieties – those green, red and yellow bell peppers that seemed to be about the only choices we had growing up.
Peppers are now grown in hundreds of different sizes, shapes and colors – all with their own unique taste.  Whether you prefer sweet peppers, savory peppers, mild peppers, ornamental peppers or our personal favorite, hot peppers  - you can add beauty and taste to your garden and landscape by planting your own this year.
We devote a large part of our garden to growing peppers – and with good reason! We use them fresh on sandwiches, in salads, salsa and soups – or simply to eat on a veggie plate.  Add to the mix stuffed peppers, grilled peppers and tasty appetizers – and you can make quite a few tasty meals from the humble pepper.  And that’s just on the fresh side! We dry many of our excess peppers to also use in our hot and spicy tomato juice, ground hot pepper flakes, chili powder, and dried chipotle peppers that we make each fall.  (Click Here For Recipes)
Here are some tips on planting and growing all kinds of peppers – along with the low down on a handful of our favorite varieties that we grow:

Growing Peppers: 

Peppers, like tomatoes, grow in well drained fertile soil
Peppers, like tomatoes, grow in well-drained fertile soil
Almost all peppers have the same requirements for successful growth.  Plant them in good, well-drained, fertile soil – and make sure they get lots of sunlight and a good inch of water per week.  In many ways, they mimic the same requirements needed for growing great tomatoes.
At Planting Time:
We plant all of our peppers with a good shovel full of compost in the planting hole, and then give them a good dose of compost tea every few weeks for the first 6 weeks of growth.  We also mulch around each of our pepper plants with a good 1 to 2″ thick layer of compost.
Peppers need support just like tomatoes do.  Our banana peppers growing strong with the support of a cage
Peppers need support just like tomatoes do. Our banana peppers growing strong with the support of a cage
Provide Support:
We all spend time and resources setting up cages and stakes for our tomatoes – why not peppers?  Peppers need some support too!  We actually use a smaller version of ourstake-a-cage method to support our peppers and keep them upright and growing strong.  No matter what you use – provide some support for the plants and peppers to grow strong.
Pruning:
Don’t be afraid to cut back a wayward branch.  We prune off the bottom foliage from our pepper plants to allow a little light into the plant and to keep pests at bay. Peppers are notorious for breaking off if a branch becomes weighty or too full of peppers.  So don’t be afraid to prune a little to keep them growing strong.
The Mini Bell Peppers have proven to be a great addition to the garden.  Beautiful colors and super sweet to eat.  The orange peppers in the picture are our Tequila Sunrise - they pack the heat!
Pick those peppers!  Keep picking your plants to keep new peppers developing
Pick Those Peppers!
To keep your plants producing all season long – keep them picked!  Pepper plants will continue to produce new peppers as long as you keep the stocks picked. The more tasty veggies you pluck from the plant – the more the plant will continue to spend its energy making more.

Our Favorites:

Besides the workhorse green bell pepper – here are some of our favorite varieties that we plant, along with some tips on how we use them in the kitchen:
Marconi Pepper
Marconi Pepper
Marconi Pepper - This quickly became one of our favorites last year for grilling and stuffing.  It is considered an Italian sweet-style pepper – and therefore no need to worry about the heat with this one.  It has fantastic flavor and the heart meaty thick walls stand up well to grilling and baking.  It was a big producer in our garden last year – and we picked them both green and red with good results in the kitchen.  These will definitely need to be staked – as the peppers grow big and heavy.  With their sweeter flavor – they are actually delicious to just slice up and serve on a vegetable tray as well.
Italian Roaster
Italian Roaster
Italian Roaster - If you were to make a hotter version of the Giant Marconi – then the Italian Roaster would be it!  A really thick-walled and tasty pepper, they seem to get much hotter when left to turn red on the vine.  The green ones are delicious and still pack a little heat – but as they turned red in our garden – we definitely noticed a turn up in the heat!  This is another variety that you will definitely want to provide support for.  We grew them for the first time last year, and the plant produced well all year long, and the peppers became very heavy on the branches.
The Cajun Belle Pepper
Cajun Belle -   The Cajun Belle is the ultimate pepper to have if you love the combination of sweet with heat.  They average about 2″  in size, and have a seed core that is easy to remove.  They make an incredible stuffed appetizer, are great to chop up in salads and salsa or chili, or to use on a sandwich.  An added benefit of the Cajun Belle – they  freeze really well and are great to pull out for use during those cold winter months.   The plants are absolutely beautiful in the garden or landscape – filling up with 50 or more brightly colored peppers ranging from green to orange to bright red when fully ripe.
Hungarian Wax
Hungarian Wax Pepper
Hungarian Sweet Wax Peppers –   These are a massive producer of 4 to 6″  long  sweet peppers. Peppers will  turn from light yellow to a deeper red and even orange when they mature. They are amazing on salads, sandwiches, and do well as a grilled sliced pepper for brats.  The plants themselves grow to around 24″ in height. We grow both a   sweet variety and the hot yellow wax pepper to use in  Mary’s hot pepper mustard.
Sweet Mini Bell Peppers
Mini Belle Peppers - These plants will grow to be about 18″ to 24″ high and are covered in tons of 1″ to 2″ mini bell peppers at a time.  They have a super small seed core that is easy to remove, and are perfect for salads and salsa.  This is also one of our favorite peppers to use for making  great appetizers.  We use a good spicy sausage and cream cheese stuffing that makes for an incredible paring with the sweet taste of the peppers.   They look great in the landscape too as an accent plant – adding a splash of color wherever you put them.
Mariachi Pepper
Mariachi Pepper
Mariachi Pepper - Another sweet-heat type pepper that almost has a fruity taste to it.  I would classify this pepper more as a sweet and fruity pepper than as a hot pepper.  It turns from green to yellow to red – and can be picked at the yellow or red stage with the same great flavor.  The plants are about 24 to 30″ in height and stay strong all year – producing peppers as long as you keep picking. Great in salads and salsa, or a sandwich – and perfect to grill or stuff.  We also dried some last year and added to our own mixture of dry spice.  If they are well watered and it is a cool summer - they tend to be more on the mild side.  With less water and more sun and heat – they turn out with a little more kick!  Another one to support with a stake or cage.
Poinsettia Pepper
Poinsettia Pepper
Poinsettia Peppers - These are actually classified as an ornamental pepper – but they have a fiery hot taste and look great in the landscape or garden.  Poinsettia peppers grow to about 16 to 24″ tall – with the pods coming on in late June.  Each plant is covered in hundreds of the pepper pods.  They start out as an ordinary slim green pepper – and then turn to an incredible fiery deep red from early August until well after the first frost.  They are a tasty little pepper that can be added to stir fry to give off some deep heat – or you can put them in olive oil to have hot pepper oil.  Poinsettia peppers are another easy seed to save and require little maintenance
Happy Gardening – Jim and Mary

Tuesday, May 7, 2013

First tomatoes are in the ground!

The new transplants - 5/7/13
This morning (May 7, 2013), our Tuesday morning garden group arrived bright and early to transplant 40 of our "babies" (Beefsteak Tomato Plants) into the Wheatley garden plot.  They also planted a garden box of garlic and sowed zinnia seeds into the middle of the Wheatley garden plot.  This is the first plants to go into this garden plot. 

Meanwhile, Julie and Devera were inside planting watermelon seeds (half regular type and half of the yummy white watermelon we planted last year), cantelope, honeydew melons, and eggplant.  They should be ready to go in the garden by the end of the month.

We'll plant more tomatoes on Saturday in the main garden and soon thereafter the peppers... it's starting to ramp up, with lots to get done in the next short amount of time.  We have beans to be planted as well as other seeds.

Thanks to all of YOU who have shown up for your assigned dates/time.  We can't do it without you!


Three rows of tomatoes in the Wheatley Garden Plot


How to Grow Asparagus


How To Grow Asparagus


There is nothing like having fresh asparagus from your own garden!  Asparagus is just one of those crops that no matter how fresh it may look or feel in the supermarket - the taste of home grown can't be beat!

There is nothing like fresh picked asparagus from the garden!

There is nothing like fresh picked asparagus from the garden!

Asparagus is different than most of the vegetable crops planted in the garden.  Unlike annual varieties such as tomatoes, cucumber and peppers that need planted each year - asparagus is a perennial.  Once established, they can provide a good crop for 20 to 25 years for you and your family to enjoy!

They also differ because plants are either male or female.  The males are known to have larger and more abundant spear production, while the female varieties tend to be thinner and produce seeds in the fall for reproduction.   Most prefer to plant only the male for the added production levels.  Popular male varieties such as Jersey Giant and Jersey Knight are great choices for those looking for maximum yields.

Asparagus can be started from seed or from what are called crowns - which are nothing more than the roots of 1 to 2-year-old asparagus plants.  Most, (including us) really prefer starting them with the crowns and not from seed.  Growing from seed can take up to 2 to 3 years to have edible spears formed - while starting with crowns can give you a few spears to enjoy by the second year.  It's also easier to start and maintain the crowns - as their growth is more defined early on, making it easier to keep weeded.

How To Plant :

The first spear of Asparagus breaking through the soil

The first spear of Asparagus breaking through the soil

With the long crop cycle of 20 or more years - it is important to prepare your bed space accordingly.  Work in generous amounts of compost to the soil before planting to provide a good starting base for your crop.  Asparagus will do best in a nice, sunny location.  They can tolerate some partial shade, but grow and thrive much better with full sun.

To plant asparagus, you will want to dig a trench about 6" deep and about 8" wide.   We like to space ours about 18" between crowns.  Place the crown at the bottom of the trench, and cover with about 2" of topsoil.  As the crown begins to grow through the soil, keep adding a few inches of soil until the soil level has filled in the trench over the course of a few weeks.  This process allows the asparagus to develop a deep root system to provide for years of crop harvests.

In the first year, allow your asparagus to grow tall and wispy to generate good root growth

In the first year, allow your asparagus to grow tall and wispy to generate good root growth.

For your first year, allow the plants to grow tall.   Resist the temptation to cut a few spears -  you want all of the growth to go to the plant and root structure.  In the fall after they have died off, you can cut them off about 1" above the soil and place a little straw or compost mulch over them for the winter.

In year two, you will begin to see some small spears shoot through the earth in the spring. You can harvest the first week or two of spears, then allow the plants to once again grow tall and build up strength.  The year 2 spears will be smaller, but still very tasty!

Year 3 is where the fun begins!  You should be close to full harvest - enjoying fresh spears each and every spring for many years to come. After each spring harvest, let your asparagus grow tall in the beds and repeat the process of cutting back after they have died off in the fall.

Upkeep and Maintenance of Beds:

Add a few inches of compost to your beds  as a mulch each fall to keep them growing strong.

Add a few inches of compost to your beds as a mulch each fall to keep them growing strong.

The biggest key to good productive asparagus is to keep your beds weed free. Weeds and grass compete for valuable nutrients, and a weedy bed will result in smaller, less productive harvests.  We use either straw or compost mulch to keep ours weed-free throughout the year.  It's also a good idea each fall to put on a two-inch covering of compost on top of your beds to give some added nutrients. Other than that - once established, your asparagus beds will provide you with years of fresh and amazing tasting crops each spring!
Happy Gardening!  - Jim and Mary

Thursday, May 2, 2013

Spring Planting Festival

Should check out this 1st annual event.... I know I'll be there:

Hey local gardeners (and wannabe gardeners) -- come support the 1st annual Heirloom and Organic Planting Festival on Saturday, May 4th.... there will be classes each hour as well as plants and worms etc for sale.    It will be at Allred Orchards, 2109 North University Ave., Provo from 1-5 p.m.  Should be great: http://www.springplantingfestival.com/

Wednesday, May 1, 2013

I love Old World Garden Farms' Blog....

3 Simple Tips To Growing A Bigger Garden Once You’ve Planted

Little cucumbers getting a good start on top of the straw mulch
So once that garden is all planted – there are some simple things you can do to really help maximize the growth and yields of your vegetable plants.
  So here are our 3 tips to growing a better garden once you’ve planted:
One of the reasons container gardening works so well – is the soil never gets trampled or compressed by heavy feet walking around them – the same can go for your garden
1.  STAY OFF YOUR PLANTS
Whether you have raised beds, raised rows, regular rows, or just a few simple garden plants tucked in to your flowerbed or small space –don’t walk near them.    When you compact the area around a plant with big soil clogging foot prints and heavy foot traffic  - it really does make it harder for the plant to grow bigger roots.  Less roots = less ways for the plant to soak up the valuable water and nutrients from the soil that benefit the plant.  If you leave the area around a plant undisturbed and uncompacted – it makes for much healthier plants.  It’s one reason raised beds and container gardens can be so effective – but even if you don’t have them – you can make a huge difference just by staying off the ground around your plants.
Mulching your garden plants is a great way to regulate soil temperature – suppress weeds, and hold in moisture for the plants.
2.  MULCH YOUR PLANTS
It doesn’t matter if it’s a pepper, cucumber, or tomato plant.  Applying a healthy amount of mulch around the base of the plant really helps.  It helps the plant retain valuable moisture.  It helps the soil temperature around the plant stay more regulated, and helps keep out weeds that compete for nutrients.  It also helps hold in the water to the plants when it rains.  What to use as a mulch?  Old grass clippings, finished compost or straw work great.
Just spraying your garden with a big garden hose can be a no-no for gardening success.
3. WATER SMART
This may be the best advice of all.  Just remember 3 things when it comes to watering that make it simple.  WHEN, HOW and HOW MUCH.
WHEN:
Watering in the early morning is best.  Before the sun has a chance to really get hot.  Water at the base of the plants and let it soak in.  If you water in the afternoon – you not only run the risk of burning the leaves from the sun scorching the water that may hit the plant – but you lose a lot more to evaporation than watering in the early morning.  Besides your beer or favorite beverage gets so much warmer in the hot sun :)
HOW:
Water slowly and at the base of each plant.  Let it soak in and come back a few times and apply smaller amounts that soak right in where it’s needed most at the root level of the plant  Spraying the whole garden with a big hose and spray nozzle can lead to a lot of problems besides just scorching plants –  like damaging plants, or destroying the blooms that create the vegetables by too hard of a spray, or helping fungus and rot develop on wet moist leaves.
HOW MUCH
Too little water and they shrivel up.  Too much water and they won’t develop the good and deep root structure needed for big plants.  A good rule of thumb is that a garden plant typically needs to receive about 1 inch of water a week.  If mother nature isn’t supplying that  - then you need to supplement.  What most don’t say is that the 1″ of water shouldn’t come all at once.  If you are experiencing a prolonged dry spell – water every two to three days with about a 1/2″ of water to the plant at a time.  This allows enough water to go deeper into the soil and build deeper roots – but gives the plants more consistent watering.  Why not every day you might ask?  If you water every day – the plants will never send their roots deeper looking for water – and you end up with much less hardy and developed plants.  Call it tough love watering  to develop stronger plants – but it works.
Happy Gardening!!!  - Mary and Jim