Tuesday, November 12, 2013

Everywhere I turn, someone is trying to get me to raise chickens...

8 Great Reasons You Should Raise Chickens In Your Backyard

Chickens are among the easiest of the "farm" animals to raise.
Chickens are among the easiest of the “farm” animals to raise.
“I have always wanted to raise chickens!” – It’s a statement we hear at least once a week, and is usually followed quickly by: “is it difficult?”.
The truth of the matter is – chickens are one of the easiest “farm” animals to raise, and only need the basics to thrive : water, food, modest shelter and a little space to roam and scratch.  And don’t think you have to live on a farm to do it – chickens can thrive just as well on a small suburban or city lot as they do on a farm.
So if you are one of those that have been considering raising a few backyard chickens of your own and need just a little more encouragement – here are 8 great reasons to raise a few of your own.  But be fair warned – do it once and you will he hooked!
1.  The Obvious…Fresh Eggs!  On average – our chickens (we have Golden Comets) lay an egg six of the seven days each week.  And yes – they are so much better than store bought! They are larger, thicker shelled, and oh-so much tastier than store bought eggs.

The Chickens, are always a big hit with the kids!
2. Great Compost Material:   The chicken manure and straw that we clean from their coop is a main ingredient in our compost.  The high nitrogen level of their manure helps to heat up our piles quickly and provide tons of nutrients to our plants in the garden and landscape.
3. Organic Fertilizer: In addition to what goes in your compost pile – you can make an amazing liquid fertilizer simply by steeping some of that chicken manure or fresh compost in water.  It’s organic, works wonders, and is the best all-natural miracle grow solution you will ever use.   (See: Making Compost Tea)
4. Bug And Pest Control:  Chickens can devour countless insects such as aphids, ticks, cabbage worms and slugs – and can help keep damaging insect populations to a minimum. They also devour many of the larvae of insects that are laid in the top layesr of the soil – keeping year to year populations in check!
Nothing can beat the taste of a fresh egg!
5. Companionship:  Chickens really do bring their own friendly and fun attitude to the landscape.  As crazy as it sounds – they do develop their own personalities, and quite honestly – our little farm wouldn’t be the same without them!
6.  Ease of Ownership:  Chickens are extremely easy to care for! We spend on average 5 minutes a day to fill up the feeder – re-supply the water, and collect the day’s eggs.  In addition – about once a month – we will take and extra 15 minutes to clean out the straw in the coop and add to the compost bin – that’s it!
7. You Don’t Need A Rooster:  Contrary to popular myth – you do not have to have a rooster to have eggs.  Which also means you and your neighbors don’t have to be woken up at the crack of dawn by loud noises :) .  Not that raising a rooster isn’t fun in its own right – but for those that live in the city and worry about noise – you can have a flock of happy hens without worry!
Our chickens are also a huge benefit to our garden through compost and organic fertilizer
8. Weed Control: Chickens are an incredible natural weed suppressor.  As they scratch and claw about – they are also taking in and eating thousands of weed seeds that have blown into the soil.  Gobbling them up keeps the following year’s weeds in check – and the garden nice and tidy.
So there you have it!  8 great reasons to keep a few chickens of your own in your backyard!  Beyond those great tasting eggs – you will be amazed at how much fun it can be!
If you would like to receive our DIY & Gardening  Tips every Tuesday – be sure to sign up to follow the blog via email in the right hand column, “like” us on Facebook, or follow us on Twitter.

Thursday, November 7, 2013

All from rain water...

Creating A Simple And Inexpensive Rain Water Collection System

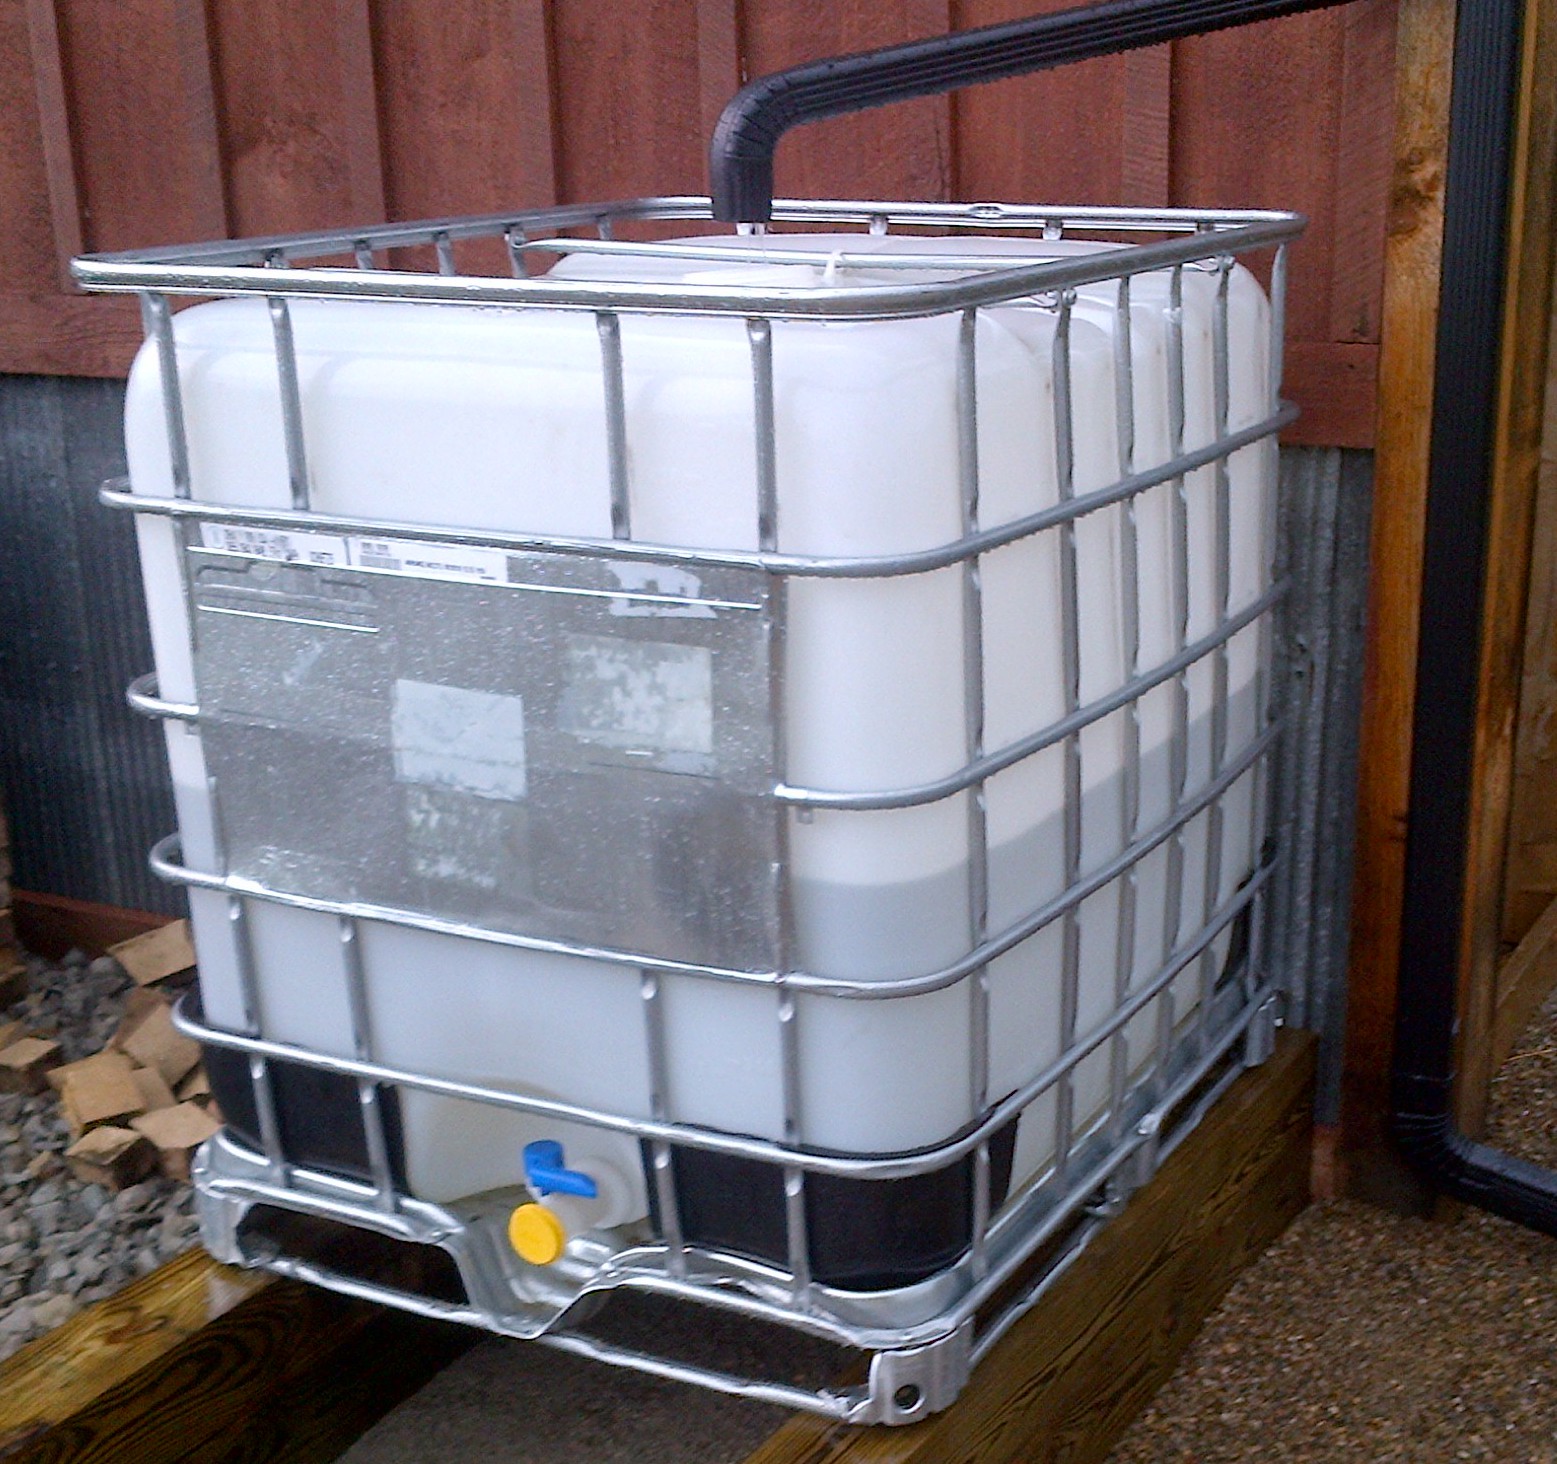
Our entire farms watering needs are met 100% with reclaimed rain water
100% of our watering needs are met using collected rainwater
Our barn's metal roof is our supply of water for the entire farm
Our barn’s metal roof is our supply of water for the entire farm
Visitors to the farm are usually surprised to learn that we water the entire garden and landscape with reclaimed rain water. Our system, which collects and stores rainwater from our barn’s metal roof, provides 100% of our annual watering needs. The best part, it was extremely easy to install, and can be inexpensively adapted to almost any home, shed or roof with a gutter.
We spent the past week hooking our tanks back up from winter storage – and within 24 hours  - we had just over 150 gallons stored from a single rain.  It’s been over a year now since we first completed the rain collection system – and I honestly don’t know how we survived without it.
It gives us access to free water, and with our two plastic tote tanks, can collect as much as 550 gallons from a single downpour.  And that’s only using rain from the back portion of the roof!  This spring, we will add a third tank fed by the front gutter – increasing our storage to just shy of 900 total gallons – enough to handle our watering needs for nearly two months of complete drought.

How it works:

Our system starts with the rain coming into simple gutters and downspouts
Through a simple in-line diverter - the rainwater is carried to our main capture tank
Through a simple in-line diverter – the rainwater is carried to our main capture tank
The water then empties into our main storage tank
This is from one single rain last week - about 125 gallons
We quickly filled almost 150 gallons from a single rain last week, the day after we hooked the totes back up.
A second tank sits above the garden for watering all of the plants with simple gravity and a hose
We connect a standard garden hose to the tanks with a simple threaded adapter
The system collects rain water from a simple adapter made to fit our existing barn’s gutter. The barn has a standard gabled metal roof measuring 13 wide’  x 32′ long on each side.  A  32′ section of guttering runs along the bottom of each side of the metal roof, slanted slightly to carry all of the water to the eastern side of the barn.   From there, both sides empty into standard downspouts.
The front downspout (not used currently), runs down and out to the field for normal drainage. On the back downspout however, we installed a simple 2-way in-line diverter (See Picture). When the metal lever is slid to the left, rain water is diverted into a 275 gallon storage tank located below the downspout. When all tanks are full, the switch can be slid back for normal drainage.
From the main storage tank, we pump and fill a second 275 gallon tank installed above our garden. With that, we can water all of our plants quickly, using gravity and a standard garden hose connected to the tank.
To increase capacity and mobility, we are adding a second diverter to the front gutter this year.  That will fill a 3rd tank mounted on wheels – giving us the ability to pull water anywhere it’s needed with our tractor.  That will be a huge time saver when it comes time to water the newly planted grapevines and fruit trees on the hill this year.
Here is a look at the system’s components and cost:
Totes: $40 each  We found ours for $40 each after searching on Craigslist.  You can also check with local food plants that may receive their raw materials in them.  One word of caution – make sure you know what was originally in your tanks and that it is safe.  Our tanks were used to hold maple syrup and molasses – simple food products that can be cleaned out and re-used.  You will want to avoid using tanks that held harsh chemicals. Most tanks come with a 6″ threaded cap on top, and a 2″ threaded outlet valve at the bottom.  You can convert the bottom 2″ valve to accept a standard garden hose with a few adapters found at your local hardware store.
Diverter Switch :  $15  You can find standard gutter diverters at your local home improvement store for about $15 – they install in minutes with rivets or screws.
Threaded Valve and Hose Adapter: $15 Your local plumbing or hardware store can hook you up with a simple threaded connection valve to convert the 2″ drain at the bottom of your tank to handle a regular garden hose.  We also installed a ball valve ($10) on our tank for an extra shut off point.
A couple of final notes on collecting and using rainwater:
Keep It Dark:  You will want to keep the water from getting direct sunlight to keep algae from growing in the stagnant water. Algae can only grow if there is light.  If your tank is translucent like ours, you will want to cover it.  We use a black covering like a grill cover to cover them up once the sun and algae become a problem. Not only does it dress it up, but it keeps the water and the flow line crystal clear.  For the pictures here, we have the covers off to show the tanks.
Keep It Covered: No matter what system you use to store your water, you will want to keep closed.  Water that sits is an open invitation to mosquito larvae .  Our totes came with 6″ caps and lids on the top.  We simply cut out the hole for the downspout, and then sealed the edge with some inexpensive foam.
Know What To Use The Water For:  We only use our reclaimed water for watering plants or washing off equipment ,etc.  Since we do not treat it in any way, we do not use it for drinking.
Check to make sure your allowed to collect rain water.  Although it sounds crazy, in some states out west you are not allowed to collect rain water, as the water rights still belong to the state.  So to be on the safe side, check with your local or state government to make sure it’s legal where you live.
Happy Gardening!! - Jim and Mary

Wednesday, November 6, 2013

Have to remember this for next year's garden...

Chili Powder and Chili Seasoning Recipe – Make Your Own In Minutes

Chili made with homemade chili powder and chili seasoning.
Are you still buying those individual packets of chili seasoning?  Or do you know how long that bottle of chili powder has been sitting in your spice cabinet?  Don’t worry – we used to buy those packets and to be quite honest, I am sure that bottle of chili powder has been in our pantry for at least 2 years. Scary when you think about it….
Chili powder made in minutes from dried peppers from the garden.
We all know that you can’t beat the use of fresh ingredients in anything you cook.  But not many people think of making their own chili seasonings.  Fall is the perfect time to gather those last few peppers in your garden and make a spice that you can use throughout the fall and winter.  It is actually quite easy and takes less than 15 minutes.  You can even personalize it and make a couple of versions to adjust the heat level based on your target audience.
For this year’s chili cook off out at the farm, we have made our own chili powder and homemade chili seasoning that is way better than any store-bought version, and of course, much healthier.  After tasting it in a fresh batch of chili, it is guaranteed to be a crowd favorite!
*As always, use caution when handling peppers – wear gloves and process in a well ventilated area.

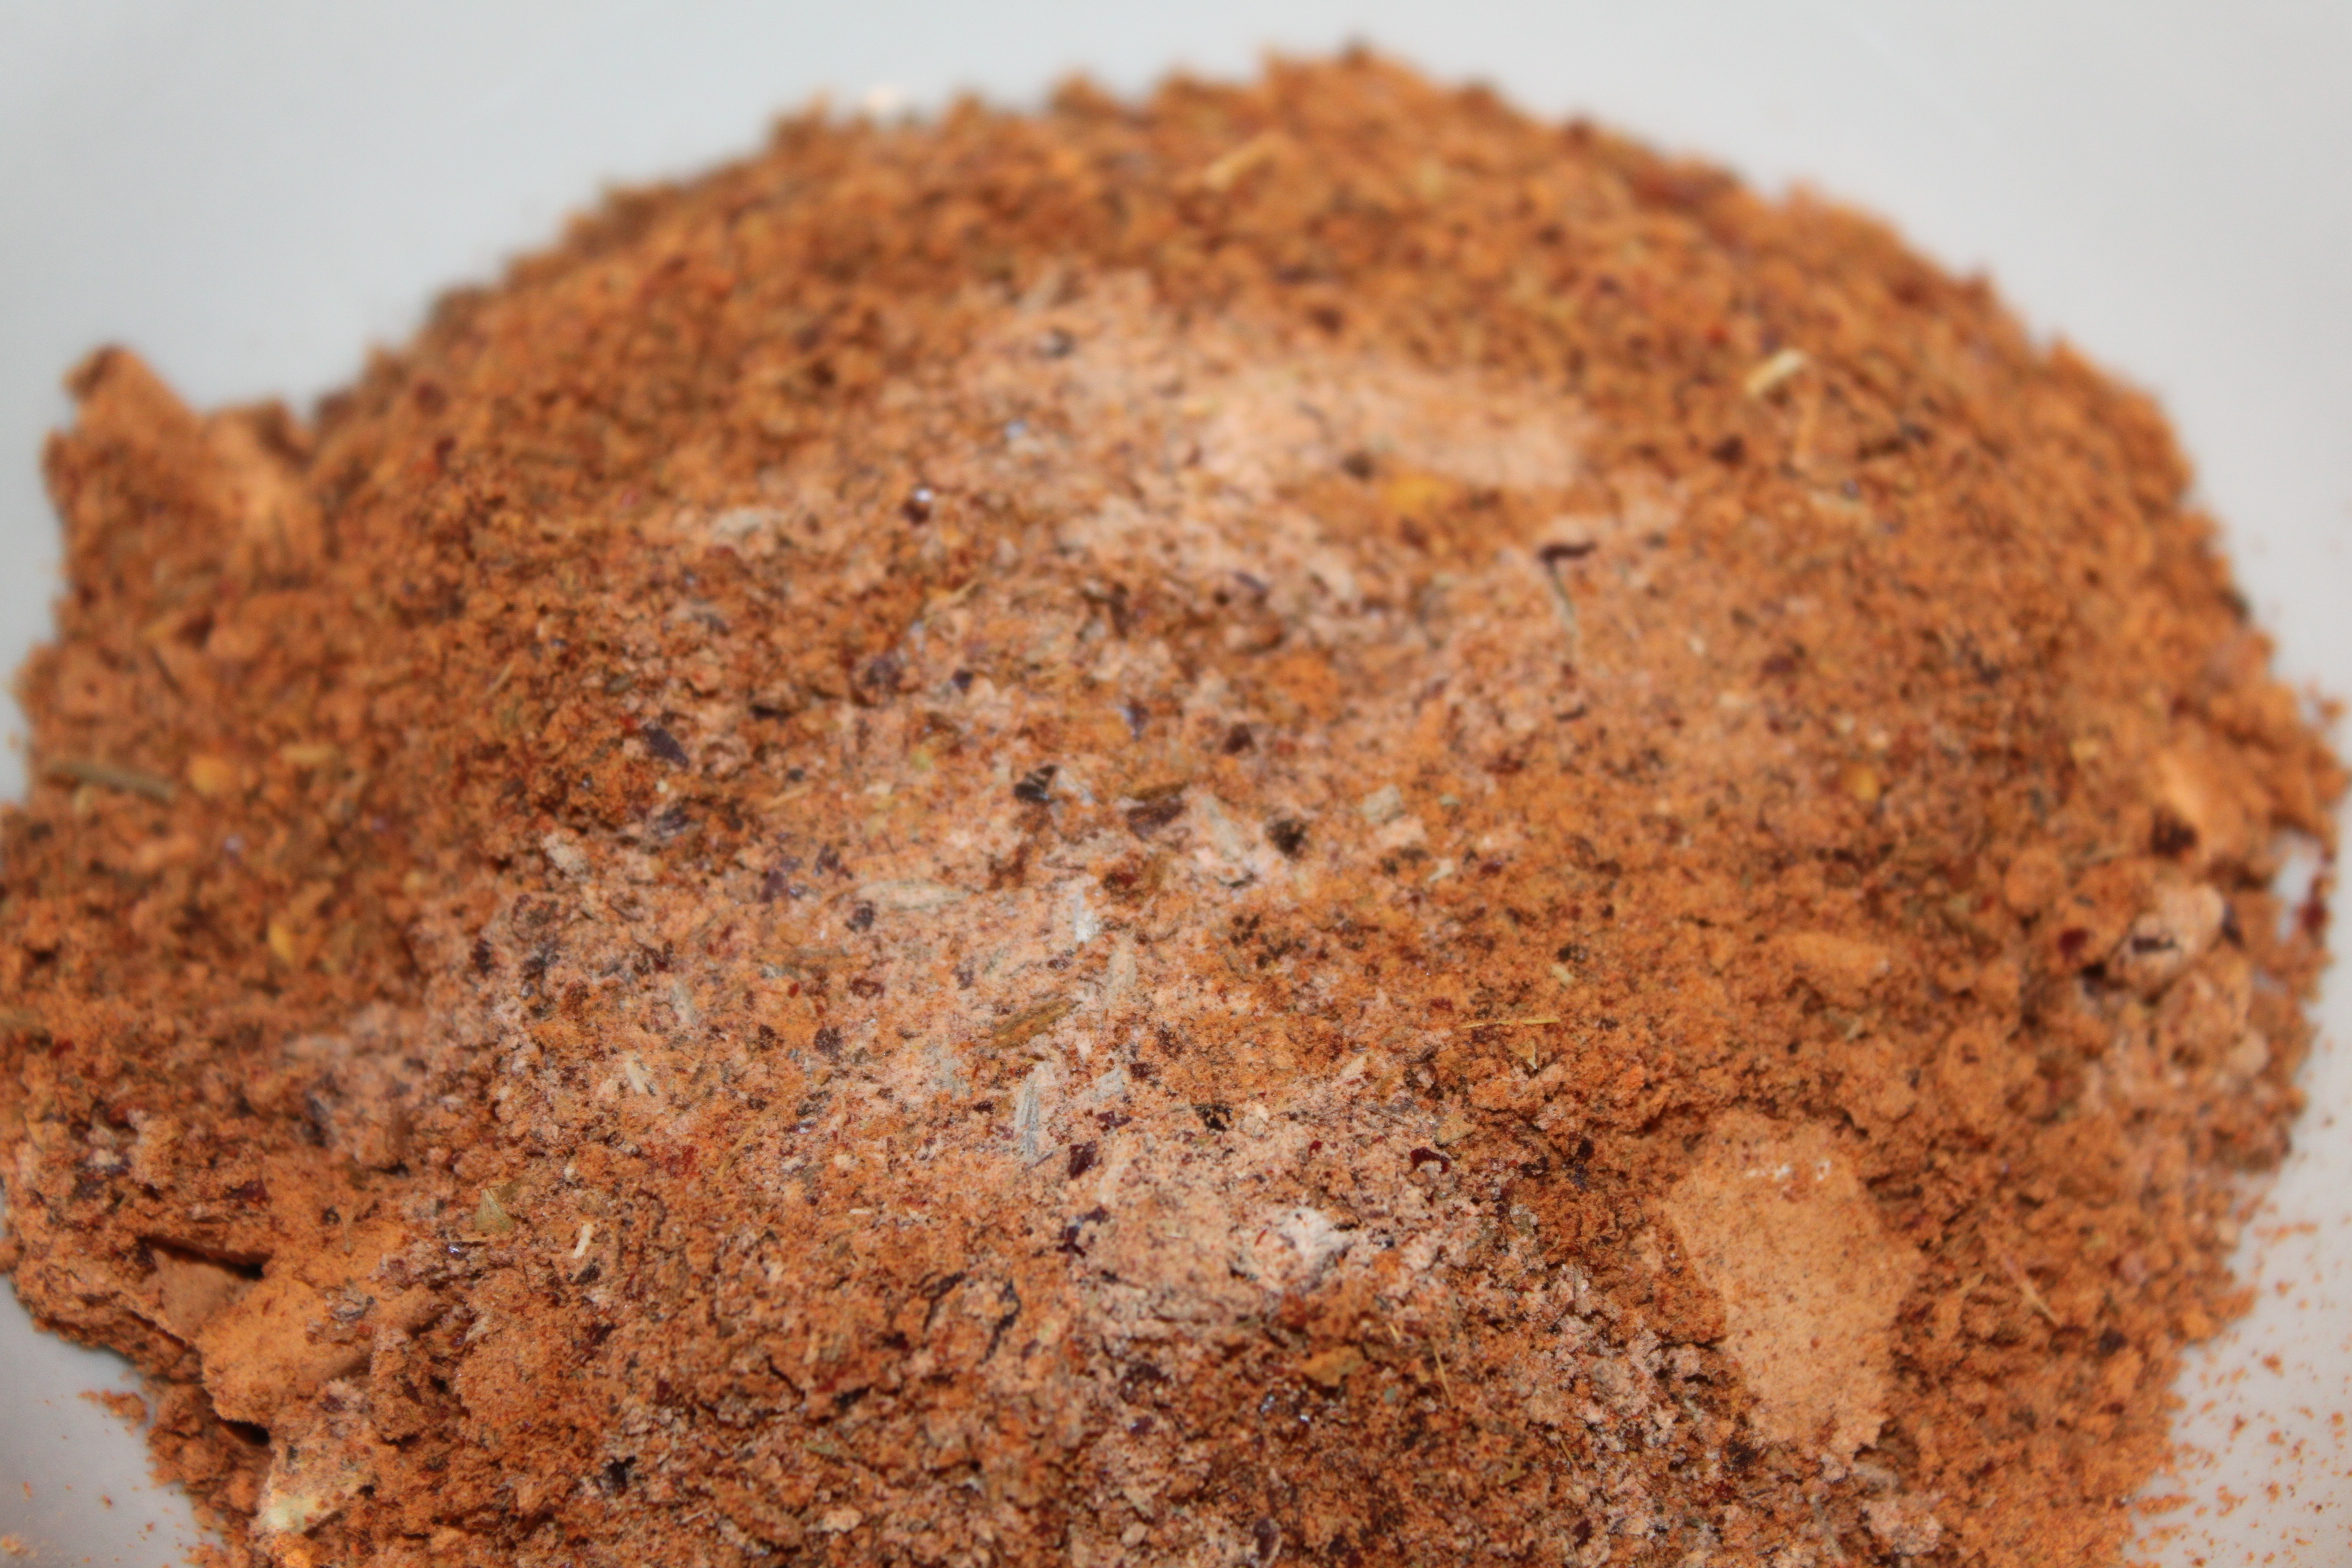
Chili Powder Recipe

Dried cayenne peppers add a nice kick to chili powder
Ingredients:
 9-12 dried peppers – stemmed and seeded
Chinese lanterns have an excellent flavor perfect for chili
*This is where strict following recipe lovers get frustrated.  I don’t put specific peppers here because it will depend on what you have available in your geographical area.  Most standard recipes call for 3 ancho peppers (dried poblano peppers), 3 cascabel chiles – also known as the little bell, and 3 arbol chiles (or substitute cayenne peppers).  
We use whatever we have in our garden that year but you can also buy a variety of dried chile peppers at a local or international market.  The key is to have a variety of peppers that produce a variety of flavors and heat. 
       Our mixture this year consists of these peppers from our garden that we dried:
3 hot banana peppers
3 mini belle peppers
2 super cayenne peppers
3 chinese lantern peppers
1 chipotle pepper

Whole cumin seeds are easy to find wherever you buy spices.
2 tablespoons of whole cumin seeds
2 tablespoons garlic powder
1 tablespoon oregano
1 teaspoon smoked paprika
Instructions:
1. Remove the stems of the peppers and most of the seeds.
Toast cumin seeds with the dried peppers for approximately 4-5 minutes.
2. Place all of the peppers and the cumin into a medium nonstick pan and place over medium-high heat. Cook, moving the pan around constantly, until you begin to smell the cumin toasting, approximately 4 to 5 minutes. Set aside and cool completely.
Process cooled peppers and ingredients in a food processor until it develops a fine powder.
3. Once cool, place the peppers and cumin into a small food processor or blender. Add the garlic powder, oregano, and paprika. Process until a fine powder is formed.
*Allow the powder to settle for at least a minute before removing your lid.
Store in an airtight container for up to 6 months. – makes approximately 3/4 cup.

Chili Seasoning Mix

Ingredients:
Add chili seasoning ingredients into a bowl and mix with a fork.
*Equals one packet of chili seasoning
1 tbsp flour
2 tbsp onion powder
1 1/2 tsp chili powder (recipe above)
1 tsp salt
1/2 tsp crushed red pepper
1/2 tsp garlic powder
1/2 tsp ground cumin
Homemade chili seasoning 'packet' ready to be added to the chili
Homemade chili seasoning ‘packet’ ready to be added to the chili
Instructions:
1. Place all ingredients in a bowl and mix with a fork
2. Store in an air tight container for up to 6 months. (yes, it’s that easy!)
Enjoy!

Friday, October 25, 2013

The garden may be finished for the year but that doesn't mean we have to be through canning....this is SIMPLE!

Simple Homemade Chicken or Vegetable Stock Recipe – Can or Freeze

Homemade chicken stock cooling and ready for storage in the canning pantry
SNOW???? In October???  Yes, it is hard to believe that Jim and I were out in the garden this past weekend picking our last green and sweet bell peppers and 3 days later it is was snowing on the morning drive to work!  I guess it isn’t that surprising – we do live in Ohio. Like the old saying goes, if you don’t like the weather here, stick around a day or two, it will change.
The stock simmering in the pot
This week’s cold weather got me in the mood to make old-fashioned comfort food. Chicken and noodles over mashed potatoes, rustic chicken noodle soup, potato soup….you get the point.  As the temperature decreases, the need for stock increases. That doesn’t mean go to the grocery and open a box or can and pour it in.  I am talking about pure homemade broth made from the leftovers in your kitchen.  It is one of the easiest canning recipes that you can make!
Save those vegetable scraps in your freezer until you are ready to make the stock.
This week was a perfect time to pull out those lonely celery stalks, scraps of onions and carrots, and even the garlic scapes that have been taking up room in the kitchen freezer for the last month.  Use as many vegetables as you want to make a vegetable stalk, or if you have leftover chicken bones, throw those in for traditional chicken broth. Although you can freeze stock – today I wanted to use my pressure cooker one more time – a sort of send off to the canning season - and also save valuable room in our freezer!  Can’t wait to bring it back out in the spring!!!!

Homemade Chicken ( or Vegetable) Stock Recipe

Makes approximately 4 quarts
Ingredients:
Vegetable scraps – celery, onion, carrots, etc…
Chicken bones/parts (omit if making vegetable stock)
Salt
Pepper
Parsley
**amounts not specified because it depends on what you have on hand, and how your like your stock.  Ours never turns out the same but it is always delicious and flavorful!
Instructions:
Making stock is a great time to use up all of those leftover veggy scraps!
1. Place all ingredients into a large stock pot and cover with water
***Option – Place all ingredients in a crock pot and cover with water
2. Bring to a boil and simmer for at least 4 hours
***Option – Place crock pot on low and let heat through overnight (10-12 hours)
Straining the chicken stock
3. Strain liquid in another large pot and bring back to a boil.
4. Place liquid in heated and sterilized canning jars – add a heated lid and ring and place in pressure canner.
5. Follow your instructions for your pressure canner and process quart jars for 25 minutes at 10 lbs of pressure (altitudes less than 1,000 feet), and pint jars for 20 minutes.
***Option – if you don’t have a pressure canner don’t worry – you can still freeze your broth — Just place cooled broth in a freezer safe container.  Check out how we froze ours here.
Enjoy!

Wednesday, October 16, 2013

Can't wait to try our popcorn... next year, maybe strawberry popcorn?

Growing And Harvesting Popcorn – Popcorn Picking Time At The Farm!

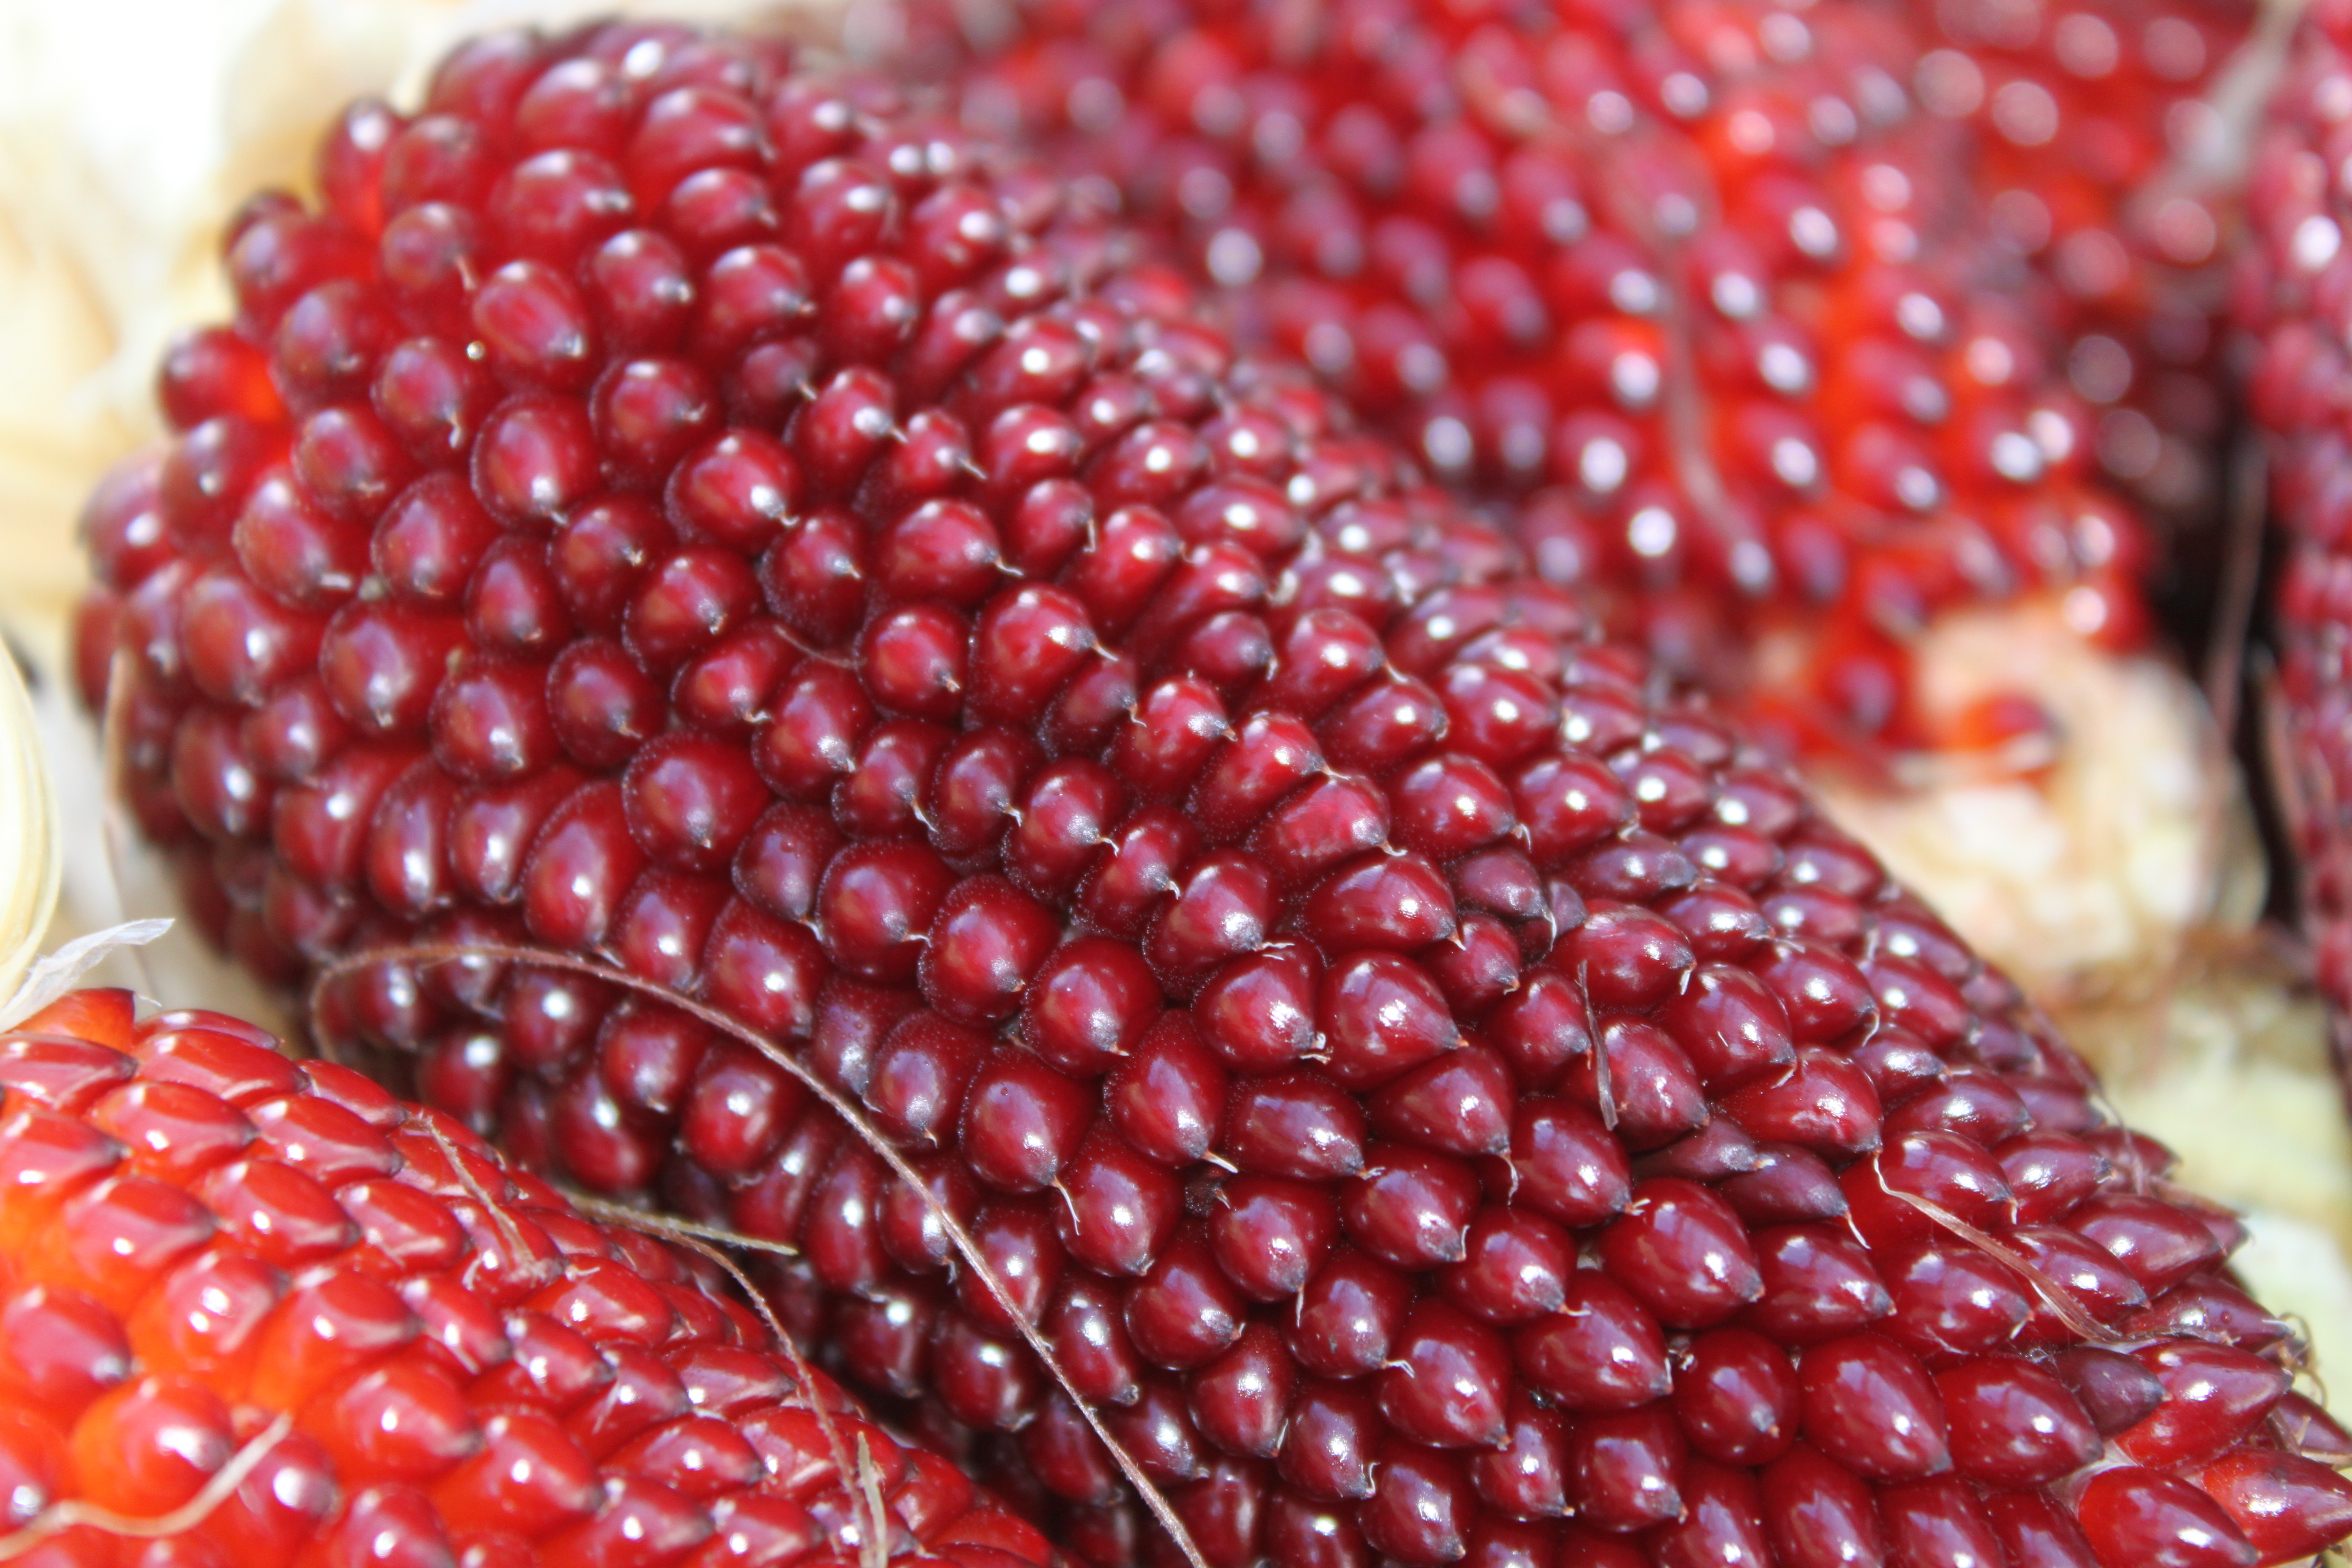
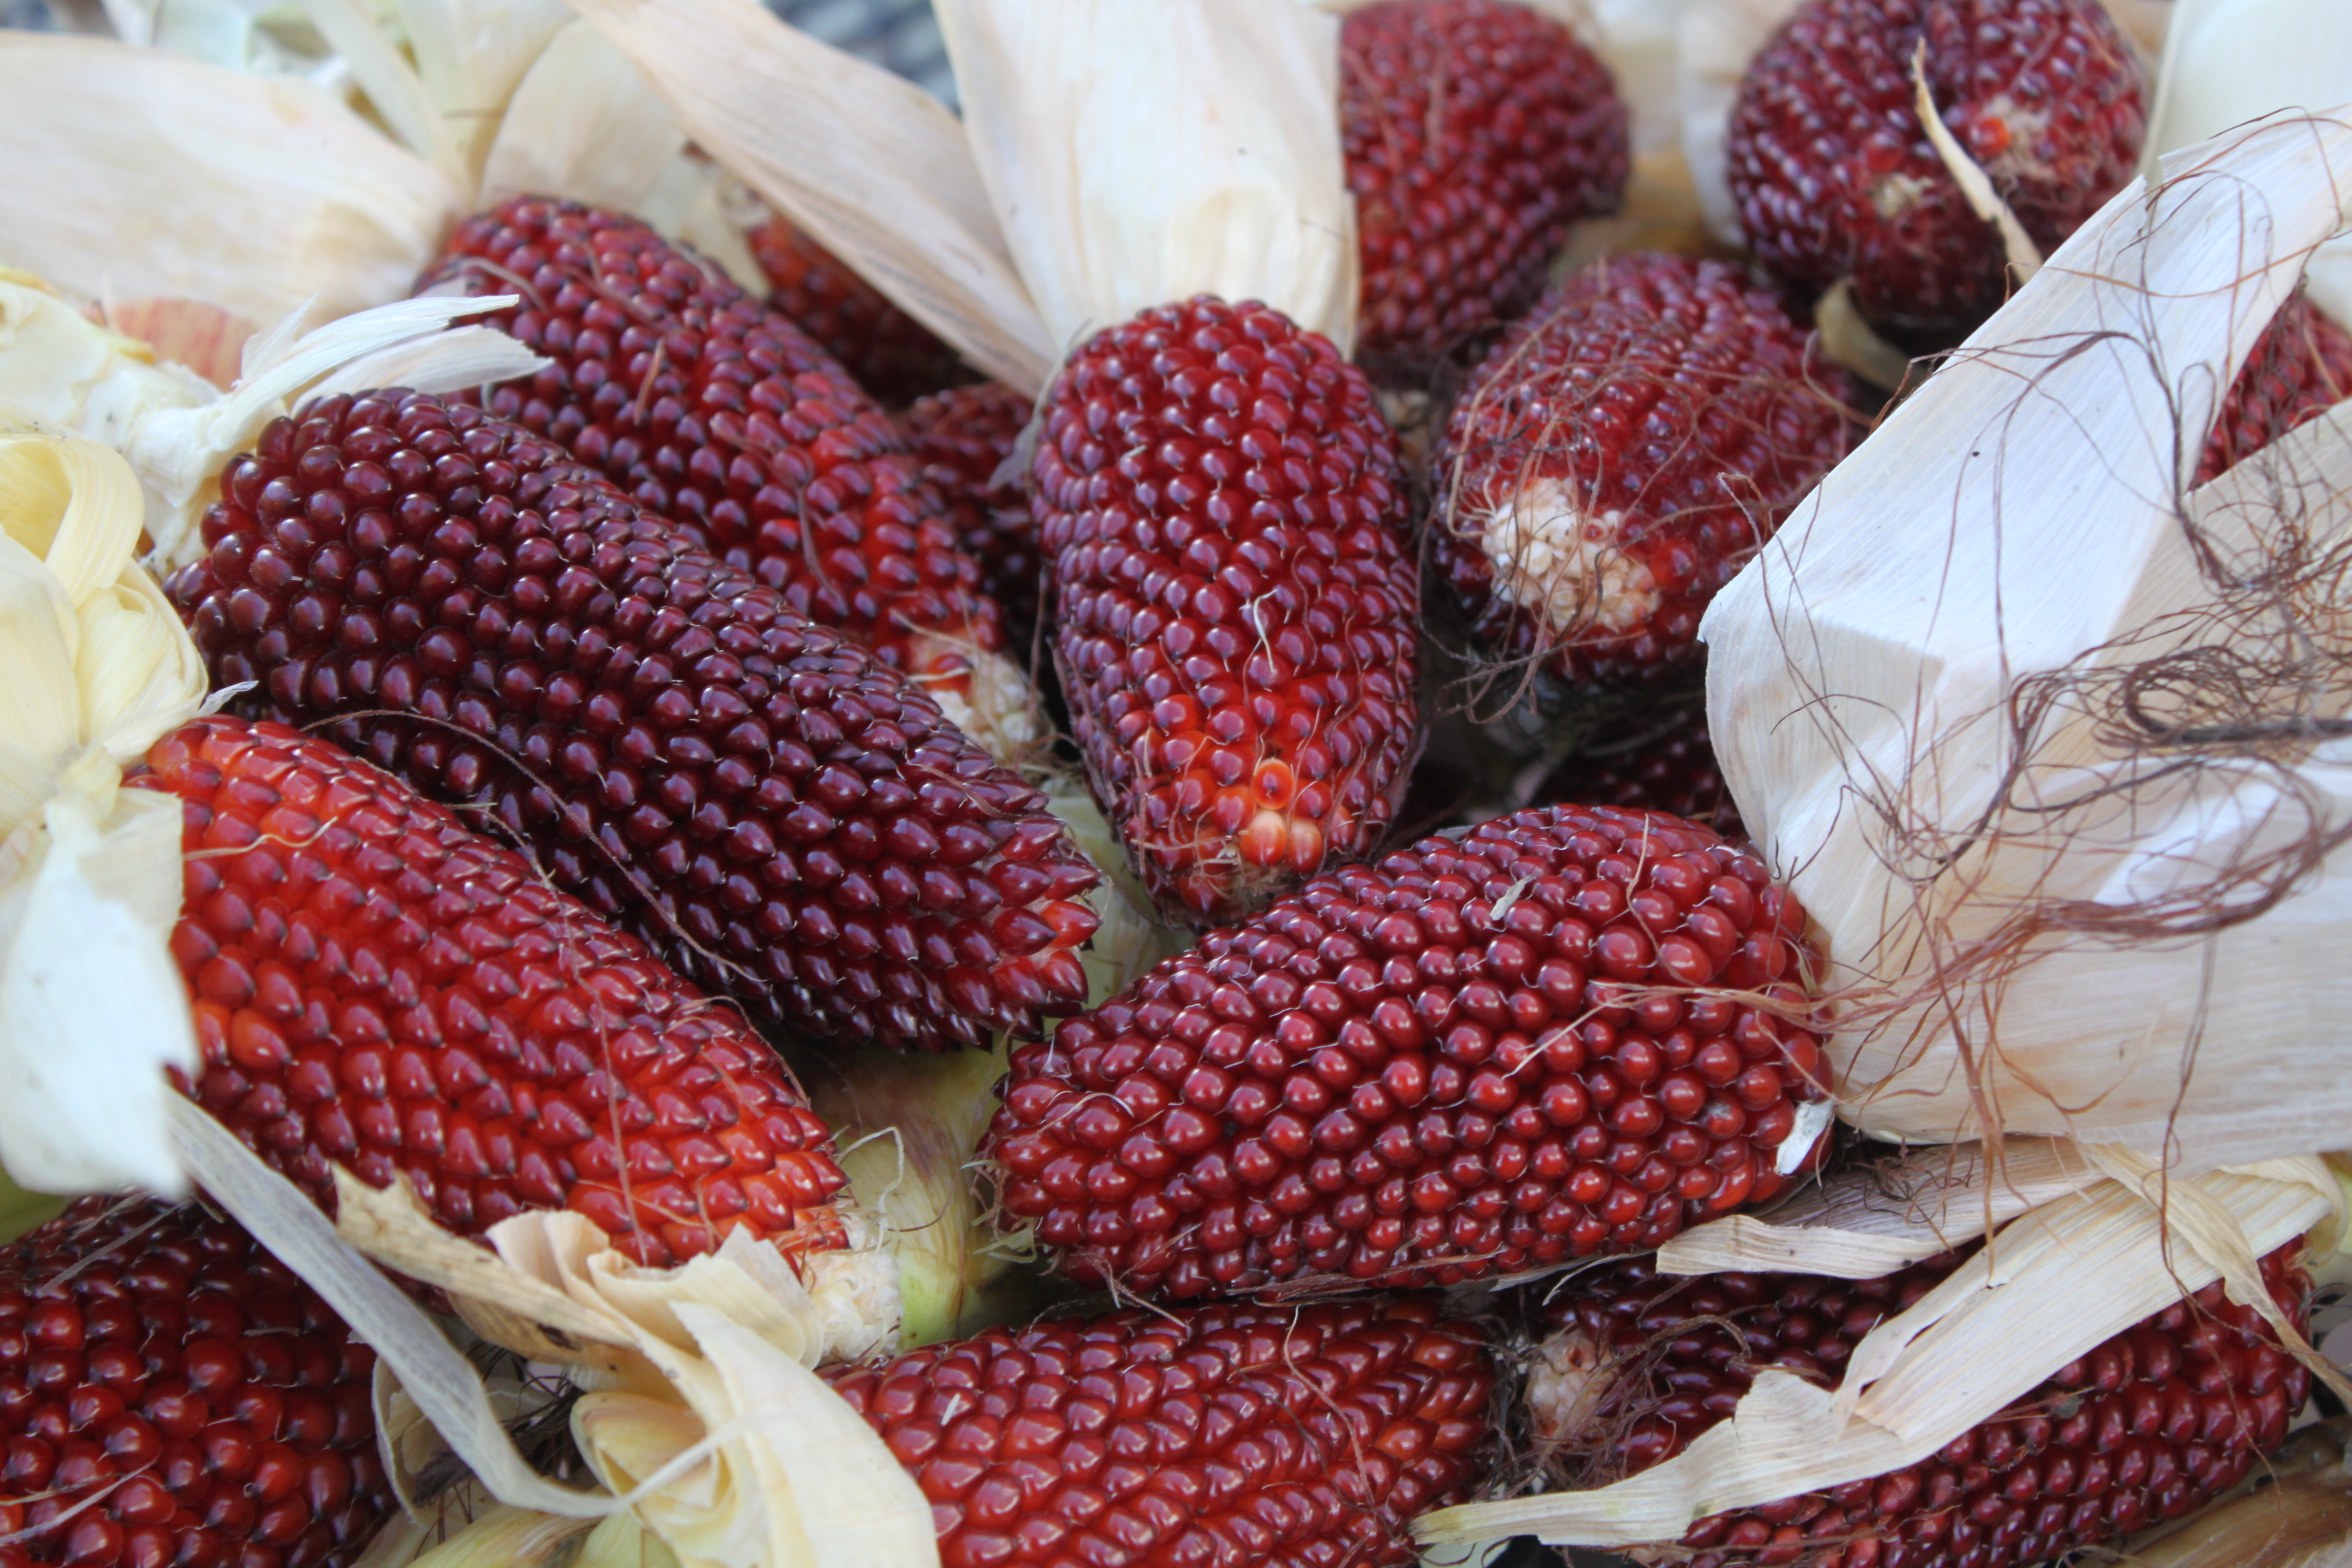
The beauty of just picked strawberry popcorn.
This week was popcorn harvest time at the farm!  We have waited all year for our little crop to grow and be ready – and as the stalks began to turn brown – it was finally time for picking!
Popcorn is one of our favorite snacks at the house – and there is nothing  better than popping your own home-grown stash!  Popcorn is actually incredibly healthy for you.  No, we’re not talking about the kind coated in fake butter, salt – and popped in bags in a microwave.
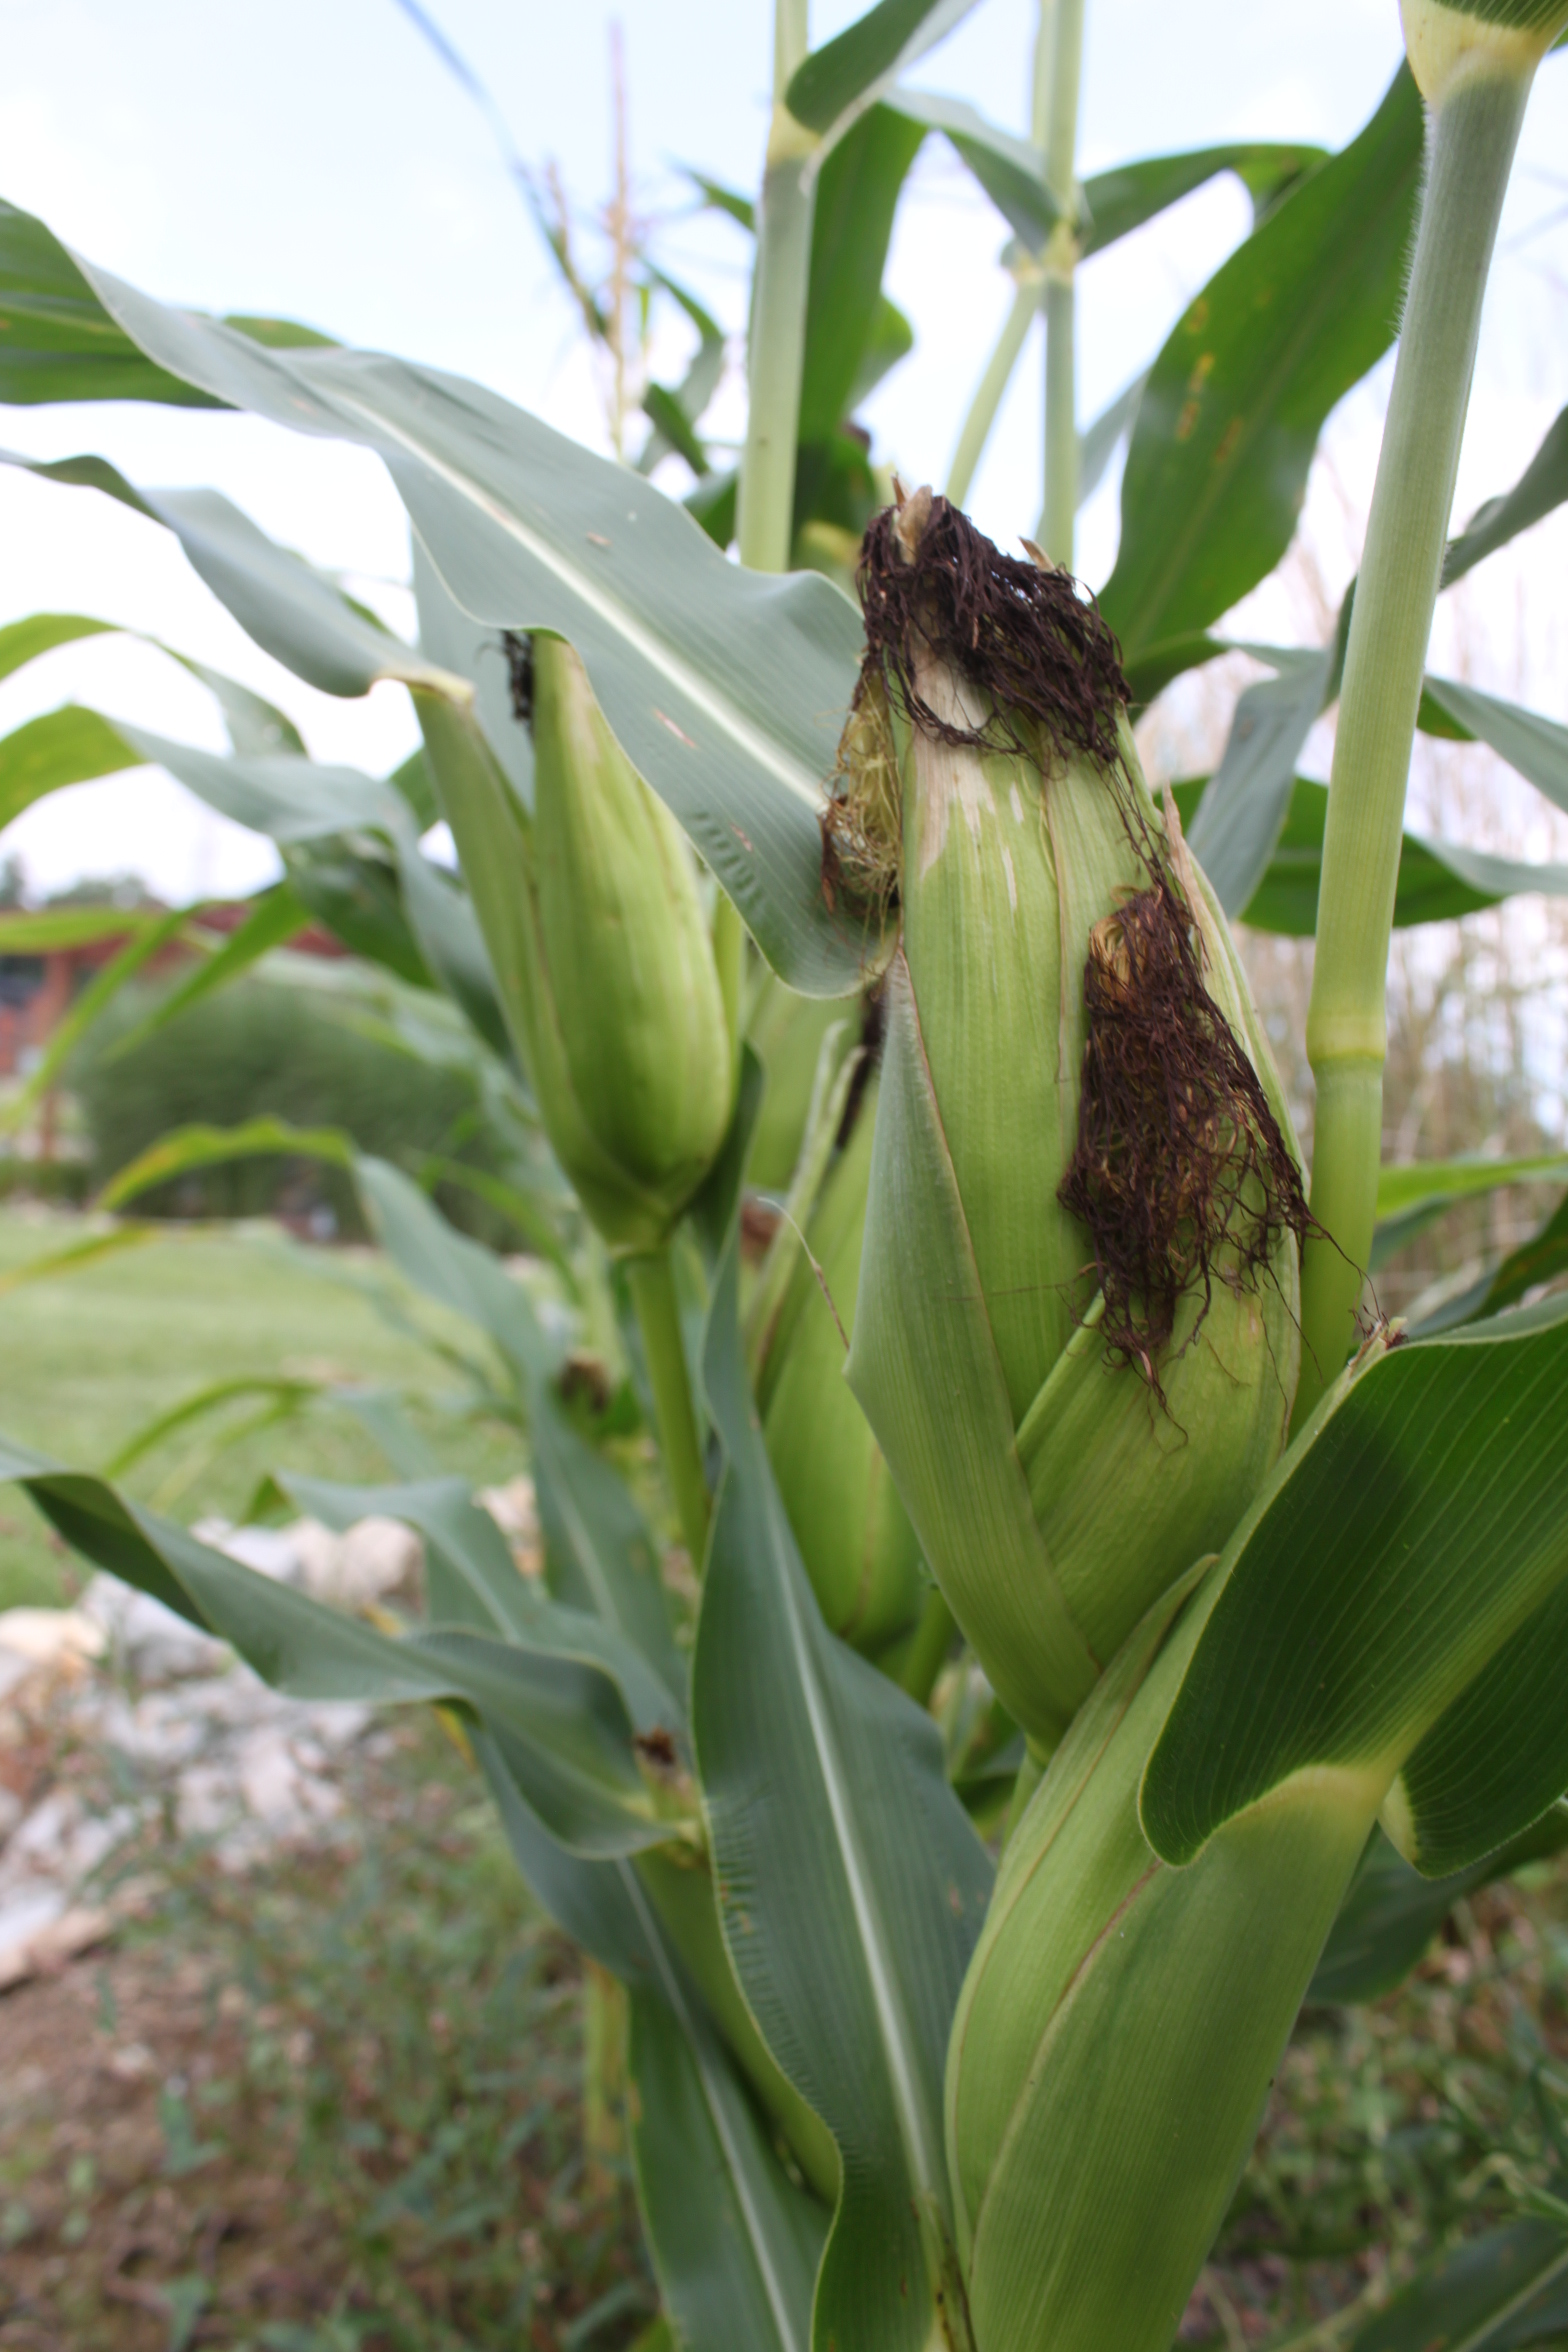
Popcorn ears drying on the stalks - and ready to be picked.
Popcorn ears drying on the stalks – and ready to be picked.
What we love to eat is pure all-natural popcorn – which we pop in a stove-top wok (with a lid of course :) ), with just a simple tablespoon of extra virgin olive oil.  You could also just as easily pop in an air popper if you have one – but either way – you end up with a great snack that is high in fiber and low in calories. The taste of true home grown popcorn can’t be beat!
There are so many varieties of popcorn to choose from – but all in all – growing any of them is much like growing your own sweet corn – with the exception they stay on the stalk a little longer to mature into hard popping kernels.
Popcorn ears developing in mid-summer
We grow an heirloom variety called Strawberry popcorn – which produces anywhere from 2 to 4 miniature 3 to 5″ cobs with bright strawberry red kernels on each stalk.  The stalks of Strawberry corn are on the smaller size as well – growing anywhere from 3 to 5′ tall to maturity. That size works well for us – as we actually plant our popcorn seed by tucking it into one of our landscape beds that are filled with ornamental grasses and peppers.  It blends in well with the tall grasses and adds a litle extra dimension and beauty to the bed space.  It has become one of our favorite things to do in all of our flower beds around the farm – interspersing the beauty of annual and perennial flowers with peppers and other food crops that can also feed us.
In addition – the strawberry corn can be used for fall decorations, and then shelled afterwards for use – making it a great dual use plant!
Strawberry popcorn is a great dual use plant - it can be used for fall decorations and as a great popcorn later!
Strawberry popcorn is a great dual use plant – it can be used for fall decorations and as a great popcorn later!
You start by sowing seed in mid to late spring, allowing the stalks and subsequent ears that develop to become plump and mature.  We leave our ears on until early to mid September, or until the stalks and leaves begin to fade and turn brown. (For us, it should be early September, but with our wet and cooler summer this year – we just now picked our ears).
After picking – we let our ears dry out for a few weeks in the barn by hanging up or placing on an old screen to cure.  As soon as the kernels become dry and hard and fall of the cob with a little push of your fingers – they are ready to pop!
You can store the corn in mason jars or any sealed container – and they will keep long enough on the shelf until your next batch of popcorn is ready the following fall!Can't

Monday, October 14, 2013

Applesauce -- now is the time...

The Secrets to Canning Apple Sauce – Recipe of the Week

IMG_4660
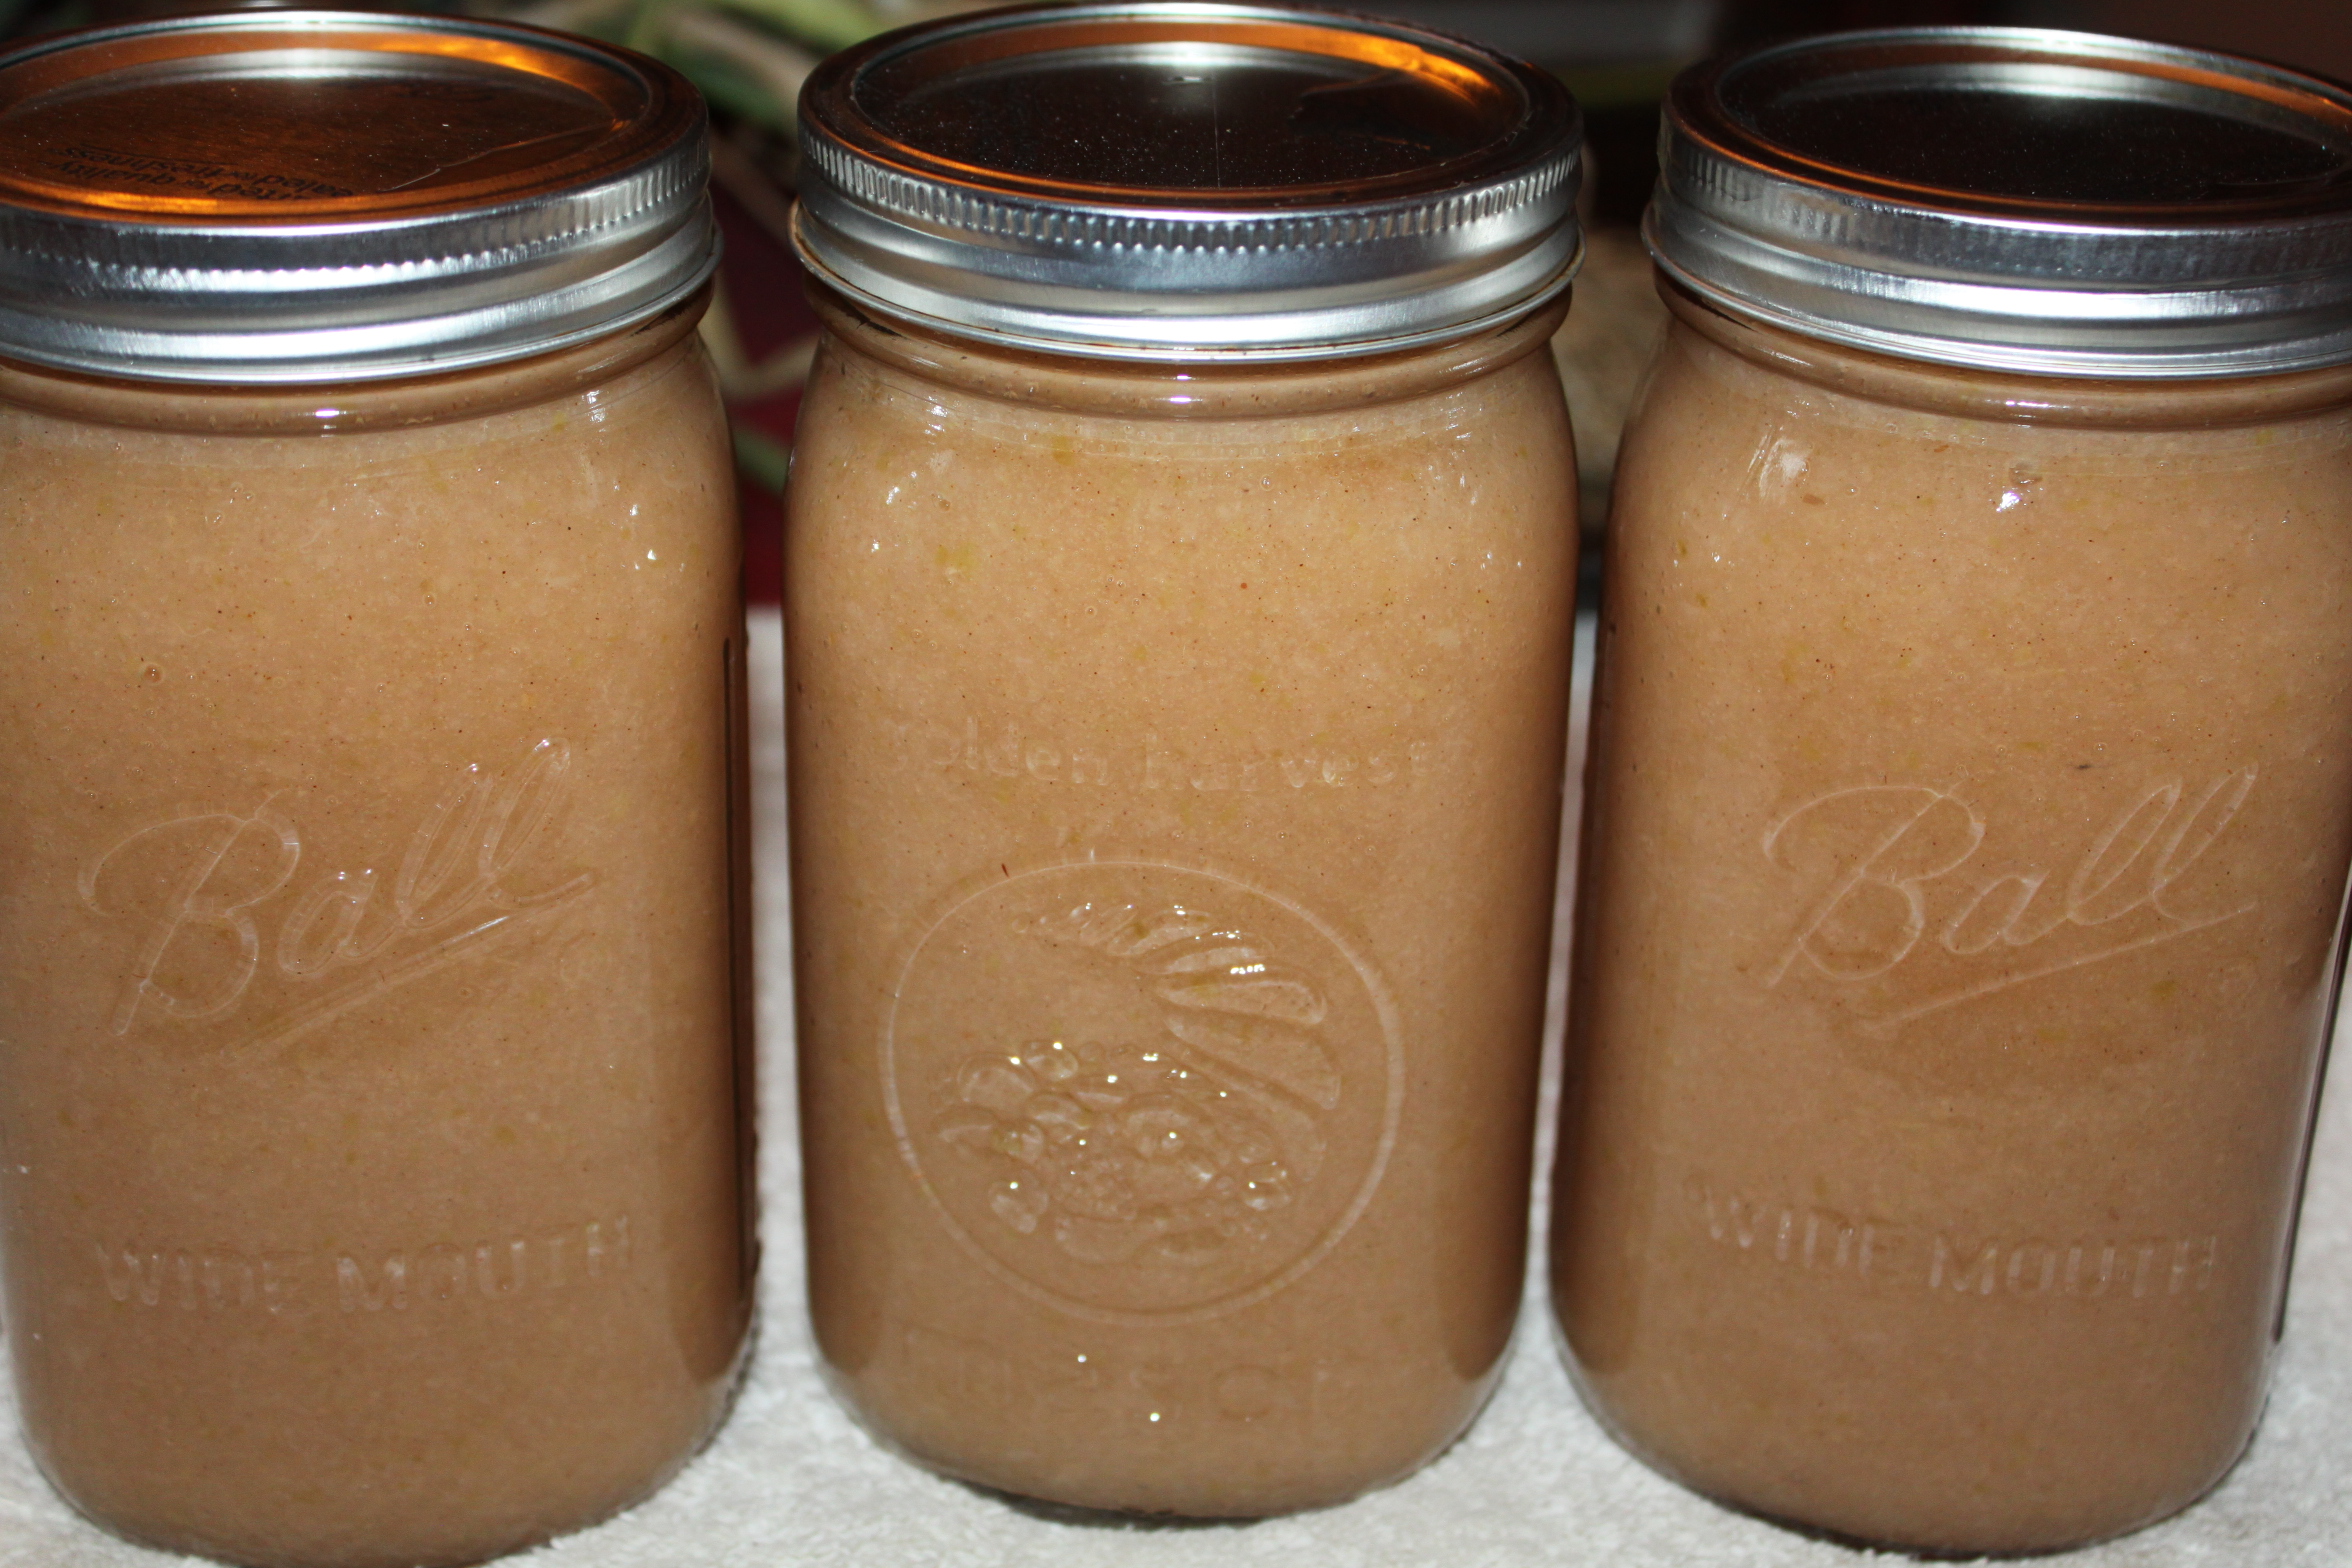
Freshly canned applesauce ready to find room on the canning pantry shelf for use over the winter.
September means many things in our house.  Kids are back to school, the garden is transitioning into a new set of fall crops and being nourished with cover crops, and because we live in Ohio, football season.  But one of the best things about September is the abundance of fresh apples from the orchard.
Our orchard is still too young to produce apples, however, we are lucky enough to have a local orchard within 15 minutes of our home.  So as I was driving home from work this week, I decided to stop and pick up my first bushel of apples with the goal to make applesauce.  I remember the days when the kids were little, that applesauce was a staple in our house.  We packed it in their lunches, ate it for dinner, and even added it to several recipes instead of using oil.  At least we knew that we weren’t adding High Fructose Corn Syrup and white sugar to our diet.  If you use the right mixture of sweet apples, there is no need to add any sugar to make the perfect sauce.
Making your own applesauce is simple – especially if you follow the tips listed below:
1. You must choose the correct mixture of apples.  That’s right – mixture is the key!  Making applesauce with a variety of sweet apples will add the depth of flavor that you are looking for, without adding any sugar.   And don’t think of throwing those Granny Smith apples in the mix – although we all love to bake with these, they need to stay out of the applesauce mixture.
IMG_4633
Cortland, Jonathan, and Mollie ‘seconds’ from the local orchard. Perfect to use to make applesauce.
2. Do yourself a favor, and buy ‘seconds’ if you can.  Seconds are the apples that are either misshapen or damaged, which aren’t prime for raw eating. However, they make great apples for sauce or apple butter, at usually 1/2 or 1/3rd of the cost. Sometimes you have to ask for seconds – they may keep them in the back room, but are quite a bargain!
3. If you plan on doing any canning, invest in a food mill of some sort.  The time that it will save you is well worth the cost!  We have both a Foley Food Mill and a Roma Food Strainer and Sauce Maker.  Both have been essential in our kitchen!  If you are just making a small batch for dinner – skip the food mill and take the extra time to peel your apples before throwing them in the pot to cook down and then use a potato masher to make chunkier apple sauce.
4. The lemon juice/citric acid debate — I prefer not to add either of these to our applesauce.  It tastes and preserves well without them!  And most importantly, it isn’t necessary.
Remove air bubbles on the inside of the jar with a plastic utensil before sealing it with the lid.
5. When canning applesauce, be sure to get any air bubbles out of the jar by running a plastic utensil down the inside of your jars.  This will stop any air being trapped in the jars, expanding, and eventually continuing the oxidation process.
6. When your water bath is finished, remove your canner from the heat source and allow the applesauce to cool for 10-15 minutes in the hot, but not boiling water.  This will allow time for the applesauce to cool more slowly and condense without producing excessive air pockets at the top of your jars, thus decreasing the risk of excessive oxidation.
So with that said, here are the simple instructions on how to make and can your own applesauce…..

Apple Sauce Recipe

*makes approximatley 12 quart jars
Ingredients:
1 bushel of a variety of sweet apples – this time I used 40% Jonathan, 40% Cortland, and 20% Mollie
Cinnamon to taste – optional
Instructions:
Using an apple corer/slicer saves a ton of time when making applesauce!
1. Core and cut your apples.  Leave the skin intact but cut off any bad spots.  This is where an apple corer/slicer comes in handy — makes it very quick to fill your pot.
2. Fill the bottom of your pot with one inch of water, add a lid and bring to a boil.
Add one inch of water to the bottom of your pot, add a lid and let the apples cook down.
3. Once the water begins to boil, stir, reduce heat to medium and let the apples soften for approximately an hour.  (The lid should remain on during the heating process). Stir occasionally to prevent burning.
4. Once apples are soft, remove from heat.
Foley food mill being used to make the applesauce and remove the skins.
**Hint – if there is a lot of extra liquid, remove the liquid to prevent your applesauce from being too runny.  Save the juice to be used in later recipes.
5. While the apples are warm, run them through your food mill and return the applesauce to the stove on medium heat. (No need for a lid now)
6. Add cinnamon to taste and return to a light simmer.
The cinnamon has been added and the applesauce is ready for the canning jars.
7. Add to sterilized and heated quart jars.  Place a warm lid and ring on the jar and place into your canner.  Water bath jars by placing water at least one inch above the tops of the jars and wait until the water begins to boil.  Boil for 20 minutes.
8. Once your time is up, remove canner from the heat source and let the jars sit in the warm water for 10-15 minutes.
9. Remove jars and let cool on a towel in a cool place, away from drafts.  You should begin to hear that wonderful ‘POP’ sound of the jars sealing.  Let cool for 24 hours – then check by pushing down on the lids to make sure the jars have sealed.  If you can not press in the lid, store in a cool dark place for up to a year.  If the jar did not seal properly, immediately place in the refrigerator and eat within 4 weeks.
Enjoy!
Mary and Jim