Monday, July 27, 2015

Asian Pickles

ingredients for fridge pickles
Asian-Inspired Quick Pickles
Ingredients
  • 5-6 kirby (pickling) cucumbers, each cut into six spears
  • 1 chili pepper
  • 1 cup seasoned rice wine vinegar (look for a brand that uses sugar instead of high fructose corn syrup, Trader Joe's makes a good one)
  • 2 limes, juiced
  • 3-4 scallions, chopped (greens and whites)
  • 2 garlic cloves, sliced
  • 4 sprigs of mint, chopped
  • 1/2 teaspoon salt
Instructions
  1. Pack the cucumber spears into a quart jar. Slide the chili pepper down in among the cucumber spears.
  2. In a 2-cup measuring cup, combine the rice wine vinegar, lime juice, scallions, garlic cloves, mint and salt. Pour over the cucumbers. Using your fingers, poke some of the garlic slivers, mint and scallion down amidst the cucumbers.
  3. Screw a lid on the jar, and holding the over the sink (in case of leaks) invert the jar and give it a good shake, in order to distribute all the delicious bits.
  4. Let your pickles sit in the refrigerator for at least 24 hours before eating.
  5. finished fridge pickles
    I had the first incarnation of these pickles at a potluck I hosted nearly two years ago. My friend Wendy brought them to the party, and by the end of the night, the once overflowing bowl was reduced to a puddle of brine and with three little spears bobbling amidst the hot peppers and onion slivers. Crisp, fragrant and flavorful, they seemed to pair perfectly with every other dish on the table.
    When the evening wrapped up, Wendy gave me permission to pour the leftover brine into a jar to save and reuse. The next day I added a fresh batch of cucumber spears and let the sweet/sour liquid work its magic. These days, I make these quick fridge pickles regularly during the spring, summer and fall, when kirby cucumbers are readily available (these do okay when made with English cucumbers, but not so well when made with waxed cukes). The brine can be reused several times (trash it when it gets cloudy).
    Feel free to alter this recipe to your liking. Wendy’s original recipe calls for shallots and cilantro. I used scallions and mint because that’s what I had. If you don’t want your pickles to be too spicy, use half a hot pepper (or none at all if you can stand the heat). The recipe is after the jump.

Tuesday, June 2, 2015

Rainy, Rainy May...

We have been really busy in the rainy month of May.

On May 2nd we planted 2800 onions and 9 rows of potatoes (yukon golds and red potatoes)
May 5th - planted 3 rows of carrots at the Scott's and planted beets, swiss chard and zinnas at the Packs. We had to finish planting 1 more row of potatoes. Now we have 10 rows. 
May 9th- planted 8 rows of corn, 2 rows of green beans, 12 kale, 4 tomatillos, and 80 cabbages. Then planted 200 tomatoes.
May 12th- planted 300 more tomatoes and a few eggplant. 
May 16th. Planted 10 rows of corn, 2 more rows of beans, and squash and cucumber hills. We planted pickling cucumbers, zucchini, crook necks, butternut, banana squash, & spaghetti squash.
May 19th we finished planting the cucumber hills adding straight 8 's and sweet slicers. We also plated some lemon cucumbers and some Japanese and English cucumbers at the Scotts on the fence line. Also 6 basil plants. We also planted some cantaloupe at the Wheatleys. 
May 23rd- planted 2 more rows of beans and then weeded the onions. The weeds are starting to explode with all this rain. First May we have only watered once. 
May 26th- We weeded the potatoes and corn and then hilled up all of the potato rows. We also replanted a few tomatoes and peppers and planted 2 more rows of peppers.
May 30th was a 5th Saturday. We planted the last row of beans with purple beans and 10 more rows of corn.

As you can see, it has been a busy planting season.  If ANY of you have pictures throughout the gardening season, PLEASE send them to susan_wheatley@comcast.net.  


Friday, April 17, 2015

Time to transplant!

Tomato seedlings growing toward the light!!!!  April 17, 2015
Although the weather outside has been bizarre, to say the least, inside our tomatoes and peppers are growing!  The tomatoes are ready for transplanting and the peppers will be within the next two weeks, at best guess.

Tomatoes and peppers under the lights - April 17, 2015
From what I hear, this next week will be beautiful weather.  We need some warmth so that we can put these tomatoes in front of the windows without getting too cold.  We are out of space under the lights so, WARM US UP MOTHER NATURE! We're counting on you!


I love to touch the tomato seedlings and then smell my hands...TOMATOES!!!

Hot Peppers - April 17, 2015

Sunday, March 29, 2015

The first seeds were planted...

Germinated Tomatoes - March 29, 2015
On Saturday morning, March 21st, a few of the garden members got together and planted tomato and pepper seeds in peat pellets, covered them with saran wrap and put them in the indoor greenhouse to await their germination.

I forgot to take pictures of the garden members who came and helped (so sorry), but we got a lot done.  We planted:

Roma Tomatoes:
  • San Marzano (30 peat pots with two seeds in each pot)
  • Italian Roma (30 peat pots with two seeds in each pot)
Beefsteak Tomatoes:
  • Big Red Beefsteak (30 peat pots with two seeds in each pot)
  • Stover Beekfsteak (30 peat pots with two seeds in each pot)
Cherry Tomatoes:
  • Sun Gold Cherries; our favorites (10 peat pots with two seeds in each pot)
  • Chocolate Cherries (5 peat pots with two seeds in each pot)
  • Baxter Bush Cherries (5 peat pots with two seeds in each pot)
Sweet Bell Peppers:
  • California Wonder; our favorite sweet bell (50 peat pots with two seeds in each pot)
  • Canary Bell (5 peat pots with two seeds in each pot)
  • Purple Beauty Bell (5 peat pots with two seeds in each pot)
  • Yummy Bell (5 peat pots with two seeds in each pot)
  • Corno di toro Bell (5 peat pots with two seeds in each pot)
  • Orange Gilboa Bell (5 peat pots with two seeds in each pot)
Hot Peppers:
  • Jalapeno (Burpee -- Pimento Picante) -- (10 peat pots with two seeds in each pot)
  • Pasilla Hot Pepper (5 peat pots with two seeds in each pot)
  • Banana Pepper (5 peat pots with two seeds in each pot)
  • Poblano Pepper (5 peat pots with two seeds in each pot)
  • Anaheim Pepper (5 peat pots with two seeds in each pot)
  • Marconi Red Pepper (5 peat pots with two seeds in each pot)
  • Cayenne (Baker Creek) -- (5 peat pots with two seeds in each pot)
Once they were planted and covered, we didn't bother them until they germinated.  No water, no heat, no NOTHING!  I know that a lot of people set them on heat mats, but we didn't do that this year.

All of the tomatoes (Roma, Beefsteak and Cherries) germinated and we could see them sprout on the morning of March 26th.  At that point, we took off the saran wrap (I use Glad Press and Seal) and put them under the grow lights.  From this point on, they will be under the grow lights at least 16 hours / day until they go out in the garden (or until we run out of room under the grow lights).  

Tonight, March 29th, I see a few of the Jalapeno peppers sprouting and a few of the other hot peppers.  My guess is that by tomorrow morning, I will see all the hot peppers sprouting and off will go the Glad Press and Seal and under the lights they will go!

If I remember correctly, the sweet bell peppers will take a while longer.  I think it was about 3 weeks last year before they germinated.  Good thing because I am already running out of room under the lights.

If any of you have grow lights and know how to take care of these babies, I would be happy to have you help us!  Just let Kim know and she will put you in touch with me (Susan Wheatley).

So, that brings us up-to-date!  In a few more weeks, they will be large enough to transplant and we will need your help once again!  


Ready, set, go!!!!

I can't believe it, but it is already garden season!  I thought about it all winter but at the same time it crept up on us and ... IT IS HERE!

For those of you who are joining the Community Garden for the first time, WELCOME!  We are lucky to have you!  We are a close-knit group that loves to garden TOGETHER!

Let me tell you a little bit about this blog and its purpose...

Tomato seeds germinated
Each year of our Community Garden, we like to track what we have done so that we can remember what works and what doesn't -- for example, what our favorite varieties are of veggies and when we started each of them by seed or by direct-sow.

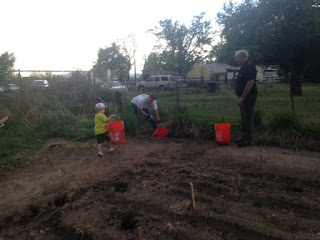
In addition, we like to throw pictures on this blog so that you can see what is happening in all the different garden plots... this is where YOU can help!  We like to have pictures of EACH garden group and EACH garden member...if you could bring your camera (or cell phone camera) and snap a couple pictures when you are in the garden from time-to-time and then send them to me (susan_wheatley@comcast.net) as a jpeg file, I would love to share them on the blog.  Unfortunately, I don't make it to each and every garden assignment and therefore, I miss some of you :(  So, PLEASE send me your pictures and I'll share them with all!  We love all kinds -- funny pictures (my personal favorite), pictures of the garden plots, of the individual members, of the sunrises and the sunsets -- anything "garden-related" we love.  We also love pictures of the children working in the garden.  What a way to make a memory!

Each year, I have made a digital scrapbook of our community garden.  I am behind on last year's book but hope to get it put together in the next week or two.

This is just an introductory post...later this evening, I will post about our first garden assignment -- planting tomato and pepper seeds.  I forgot to take pictures of the garden members doing the planting (out of the habit) but did take pictures of the actual seed pellets and now that they have germinated, I have pictures of that as well!  Be watching for that post next!

Until then...